Deployment
Egress
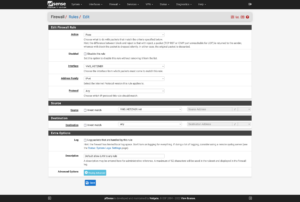
In order to make egress traffic, you’ll want to copy the default “Allow all” rule from the PROXMOX rules to the VMS_HETZNER rules. You can do so by clicking on the Copy icon which is in between the Edit and Disable icons. When you have the option to edit your duplicated rule, change the Interface option from PROXMOX to VMS_HETZNER and the Source from PROXMOX net to VMS_HETZNER net, and then click on the Save button.
Set up a temporary Virtual Machine using the Ubuntu Desktop trial in the same manner that we used it to initially configure the firewall. As you’re creating the Virtual Machine, be sure to set the Network bridge to vmbr2 so that it’s on the first LAN dedicated to the initial Static IP of the firewall (I’ll demonstrate the second LAN in a subsequent section). From there, you can Google “What is my IP?” and you should see your server’s IP address.
Ingress
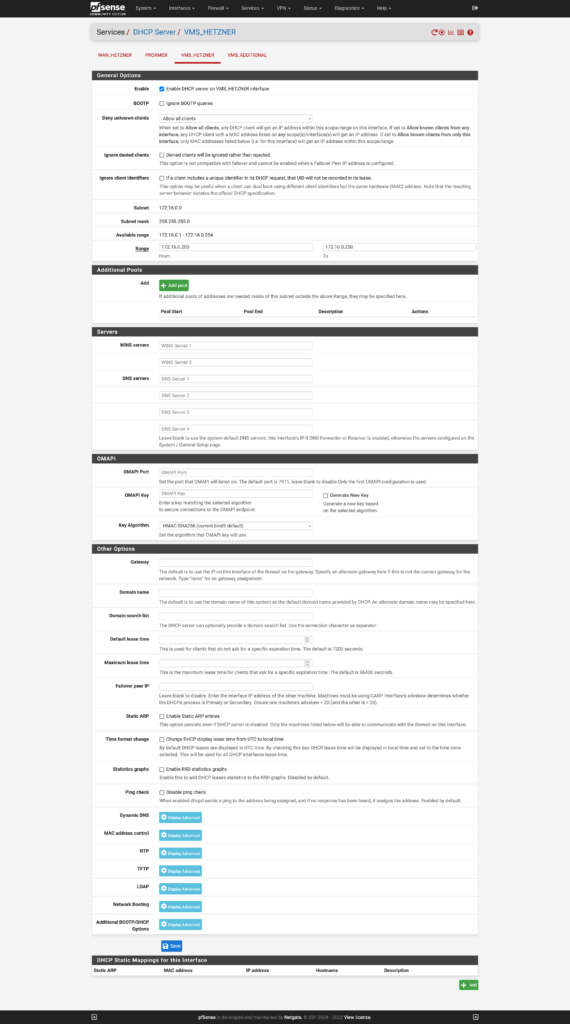
A DHCP server should be running for your LAN network, but if it’s not, you can enable it by clicking on Services → DHCP Server → VMS_HETZNER → Enable DHCP server on VMS_HETZNER interface.
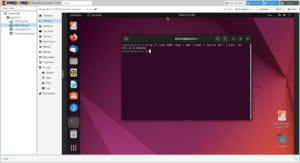
To discover your Virtual Machine’s IP address with CIDR, run the following command in a terminal:
ip -f inet addr show | awk '/inet / {print $2}' | tail -n1
In my case, my Virtual Machine’s DHCP-assigned IP address is 172.16.0.200.
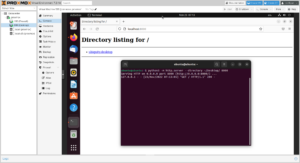
On this same Virtual Machine, you can use Python 3’s simple HTTP Server module to serve the contents of the desktop on port 8000 by opening a terminal and running the following command:
python3 -m http.server --directory ~/Desktop/ 8000
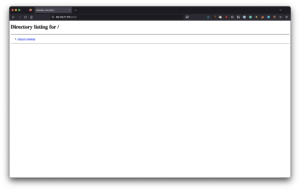
You can confirm that it’s working by opening a web browser inside of the Virtual Machine and going to http://localhost:8000 and should see a screen similar to this screenshot.
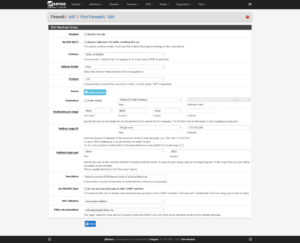
Remember earlier where we created NAT rules to access Proxmox from the Internet? The same principle applies here. Now that we have a web server running in a Virtual Machine on port 8000, we need to expose the port to the Internet. We’ll set the target IP to the one that we discovered above, 172.16.0.200.
Aside from a simple demonstration and for a real-world deployment, you would assign a Static DHCP IP Address to the Virtual Machine in the firewall DHCP Server page for the interface or set the Virtual Machine’s IP address manually.
Table of Contents
14 replies on “Deploying Proxmox 7 behind a firewall VM”
Excelente post
Thanks, John!
Great post. Thank you so much – exactly what I was looking for!
But I’m missing a step-by-step guide to include Traefik 2 to your setup.
Or can’t I simply find it?
Hi Fred,
I try to split complex topics into their own articles. You can find my Traefik 2 guide at https://LTG.FYI/Traefik-2. Please let me know if you have further questions, and I’ll try to answer them here or perhaps write additional articles.
Best regards,
Louis
Great post. Thanks!
I’m just in the process to replicate your setup.
Nearly everything is working but I can’t get any DNS servers working on OPT2. The traffic is routed over the WireGuard-VPN, all fine.
But it seems that any UDP traffic is blocked and I can’t figure out where to unblock it. Any hints much appreciated! Thank you.
Hi Andreas,
Off the top of my head, maybe I forgot to document the DNS Resolver section, but will have to go re-read my article and look for anything that I might have missed, but am in the middle of bee season (video of some of it: https://LTG.FYI/YouTube) and helping restore multiple ranches, so it may take me a moment.
I’ll e-mail you and try to figure it out with you. Once you and I figure this out, I’ll make appropriate edits to the article or one of us can write here in the comments about what needed to be changed.
Thanks,
Louis
EDIT: I e-mailed you and the e-mail bounced back as an invalid address. Please feel free to reach out again with a way for me to contact you, so that we can try and figure out what the problem is.
Thank you so much for your tutorial!!!
I can’t access the Ingress server from the VMS_Hetzner network, from external it’s working.
Like in your example: “Now I can access the simple server remotely by visiting http://65.109.71.115:8000”
I can access the website from my browser, but not from a browser running with any VM on the VMS_Hetzner network.
Any idea which Firewall rule is blocking the access from VMS_Hetzner to WAN_Hetzner?
Hi Loomer, you are most welcome! 🙂
I used the interface’s address for the VMs to access the firewall interface. Please see https://thad.getterman.org/articles/proxmox-7-behind-firewall-vm/5/#live_desktop for an example of a Virtual Machine accessing the firewall’s GUI via the VM interface address to configure it instead of the WAN address.
Best regards,
Louis
EDIT: I e-mailed you and the e-mail bounced back as an invalid address. Please feel free to reach out again with a way for me to contact you.
I am new to proxmox and your article just blew me away.
I just got the hetzner with 15hdd (no nvme) and I asked for KVM to install proxmox directly on the baremetal
But you do some sort of magic.
you boot into recovery and install proxmox in qemu?
I cannot say I follow
I am not sure I follow (and obviously I already broke my setup trying to change the network settings)
Hi Marcin,
I’ll e-mail you so that we can schedule a time for me to have office hours with you; you screen share with me in observation mode so that I can tell you what to click on and help you get up and running.
I’ll make a YouTube video out of it and then add one or more relevant videos to this article.
Talk soon,
Louis T. Getterman IV
Hi,
Thank you very much for sharing this tutorial. It was extremely useful.
My home lab server was running for a few weeks without any problems. However, I have decided to upgrade Proxmox from v7 to v8 this week. I temporarily updated the /etc/network/interfaces file with the configuration in the /etc/network/config-recovery file. The upgrading process ran smoothly, and, in the end, I have updated the /etc/network/interfaces to the original configuration. Everything is working except the fact that in the Proxmox instance, I have no access to the internet. After some debugging, I noticed that, with the upgrade, the default gateway of Promox changed to 172.16.0.1. The output of ip route show is:
default via 172.16.0.1 dev vmbr2 proto kernel onlink
172.16.0.0/24 dev vmbr2 proto kernel scope link src 172.16.0.0
192.168.1.0/24 dev vmbr1 proto kernel scope link src 192.168.1.2
If I delete that and manually define the default gateway to 192.168.1.1 everything works normally. Also, if I comment the line with ‘gateway 172.16.0.1’ in the /etc/network/interfaces, the problem is solved after restarting the networking service. I am not sure if I am supposed to do that, as you had that line in the /etc/networks/config-runtime file
Hi Miguel,
I had the exact same problem.
I can resolve it after a reboot by using the command:
ip route replace default via 192.168.1.1 dev vmbr1 proto kernel onlink
But how can you make this change permanently? What needs to be changed in /etc/network/interfaces?
Has anyone else done the upgrade to v8?
Any guide available?
I’m a little bit scared to do it.
Hey Louis,
First, awesome guide.
However, I am running into some issues when trying to do the same on my Hetzner dedicated server. For some reason, even if I follow all steps, the OPNsense/pfSense VM can’t be reached via the public address.