Tailscale subnet routing
If you’re not familiar with Tailscale or Netmaker, they’re VPN mesh networks built on top of WireGuard, and make it simple for machines to access each other in a private manner, including when those machines are behind NAT/CGNAT. For this article, I’m demonstrating with a stock install of Tailscale. If you want to self-host like Netmaker allows you to do, you can use Headscale and Headscale UI, but that’s outside the scope of this article.
Installation
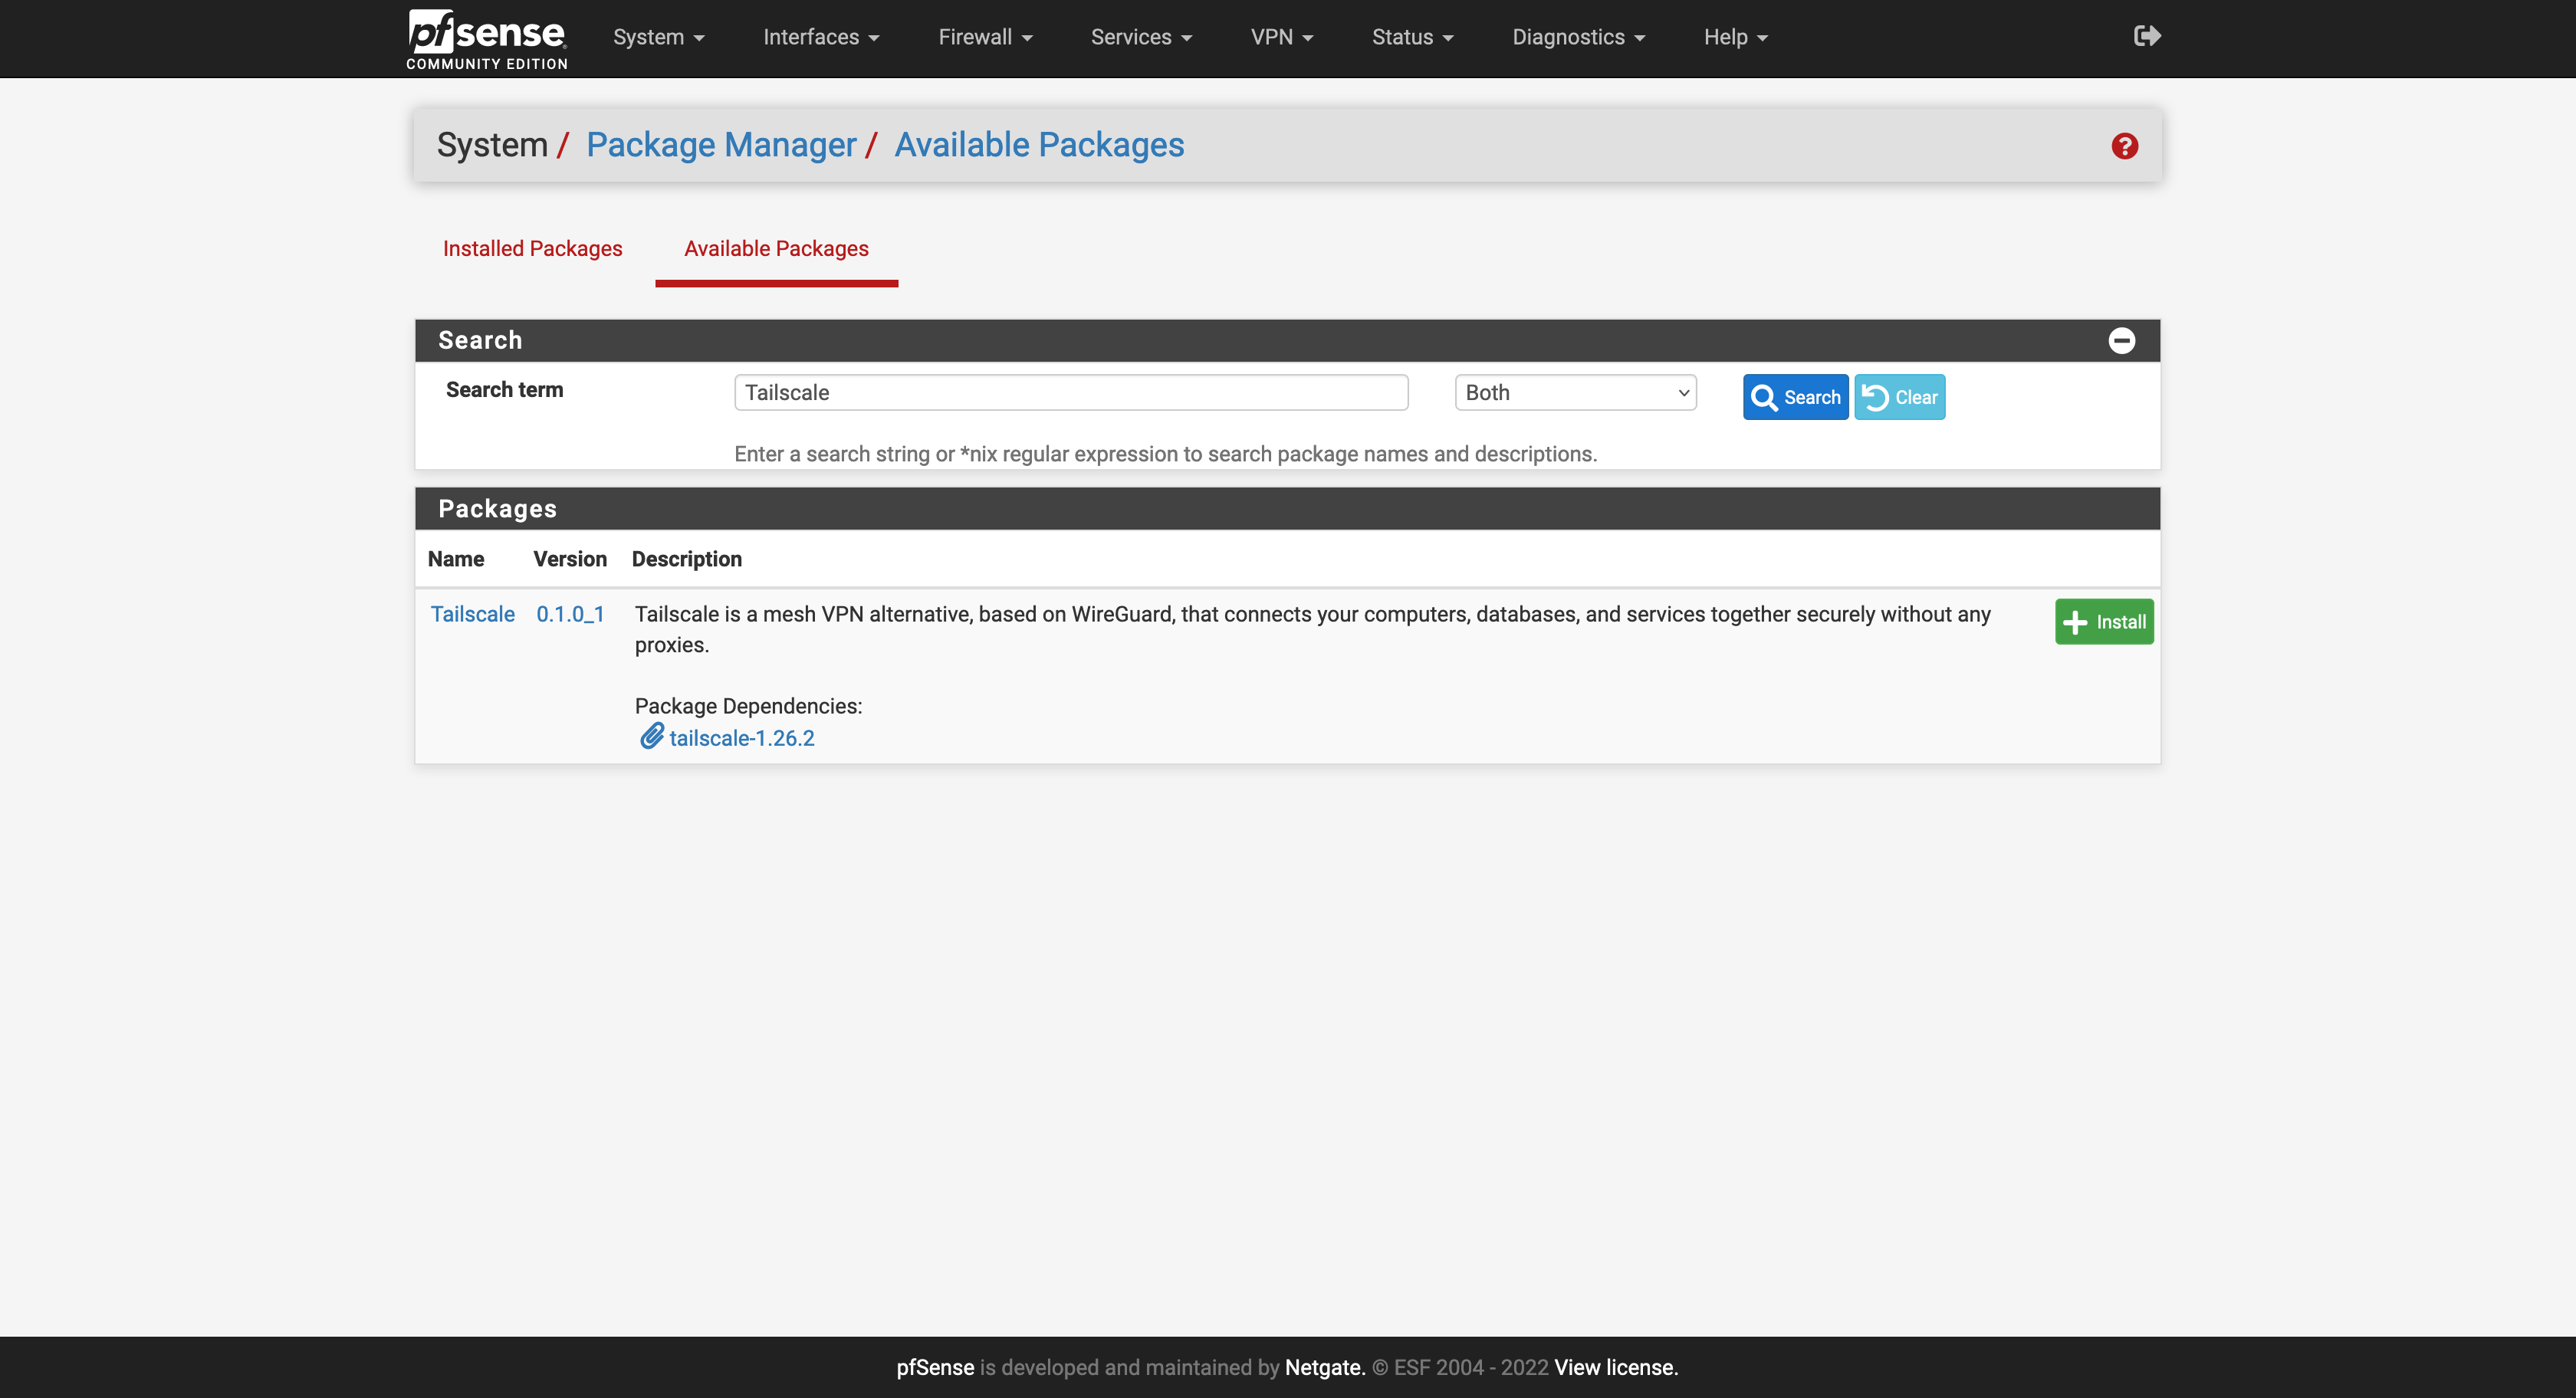
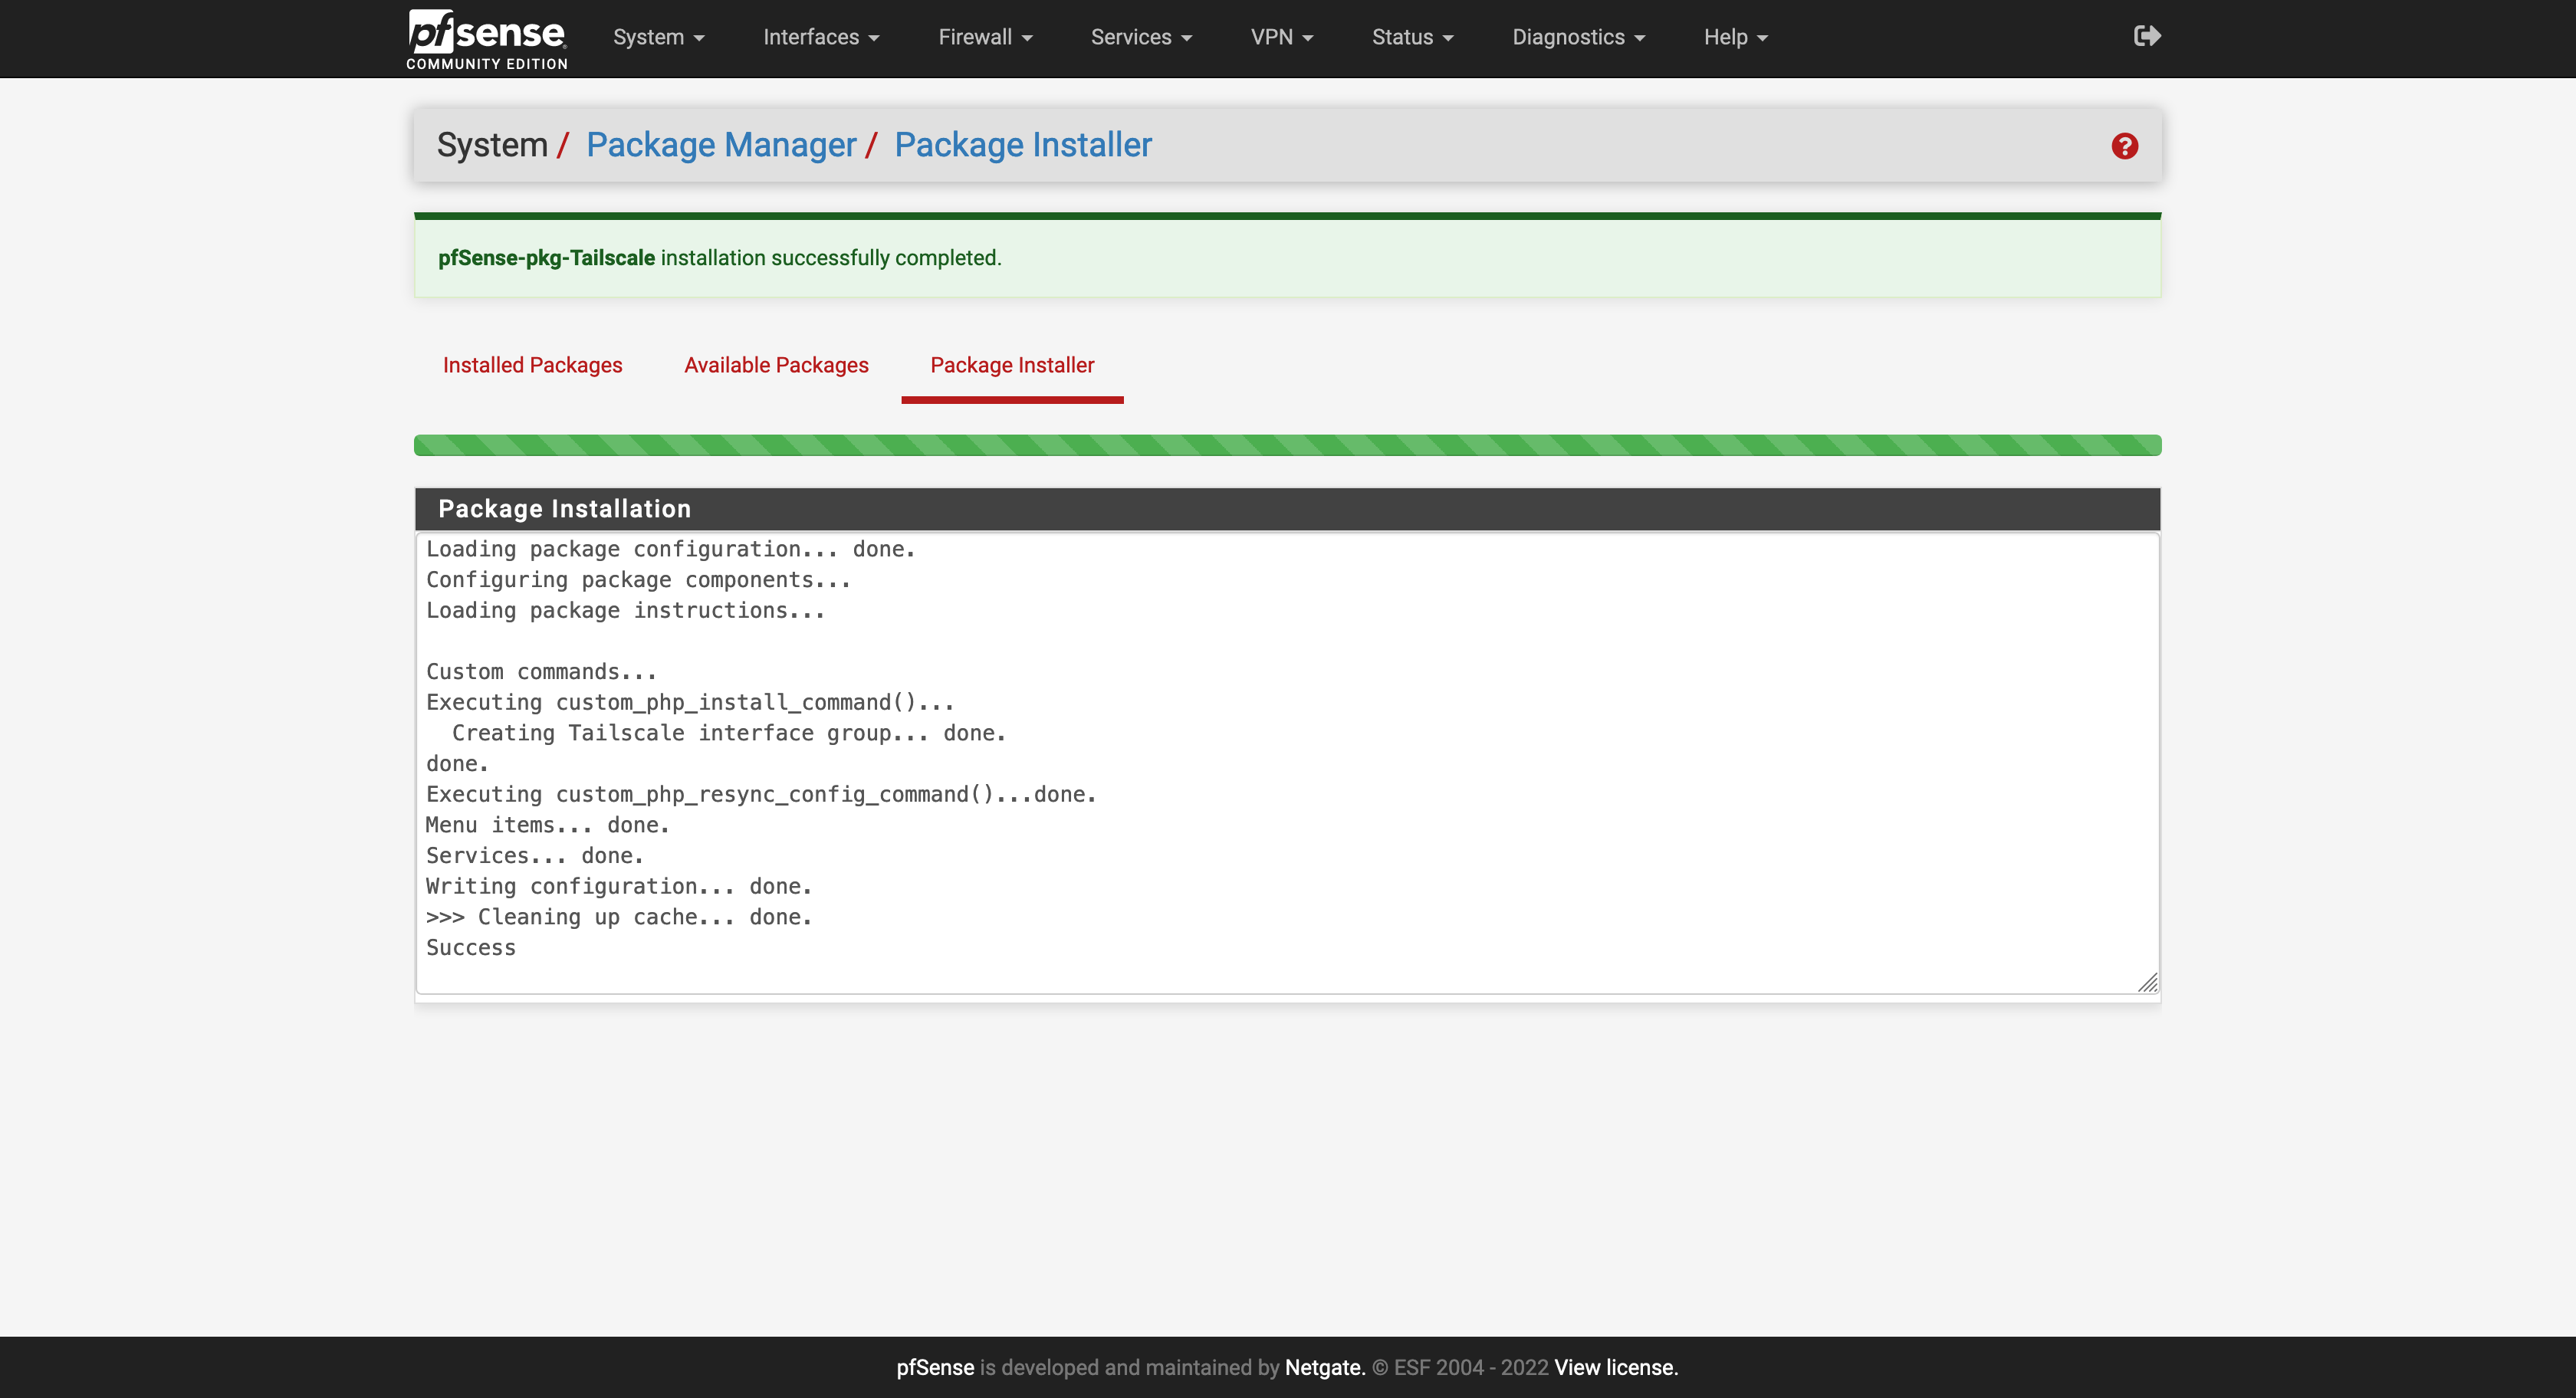
Add the Tailscale package by clicking on System → Package Manager → Available Packages → Search term → Tailscale → Search → Install:
Direct connections
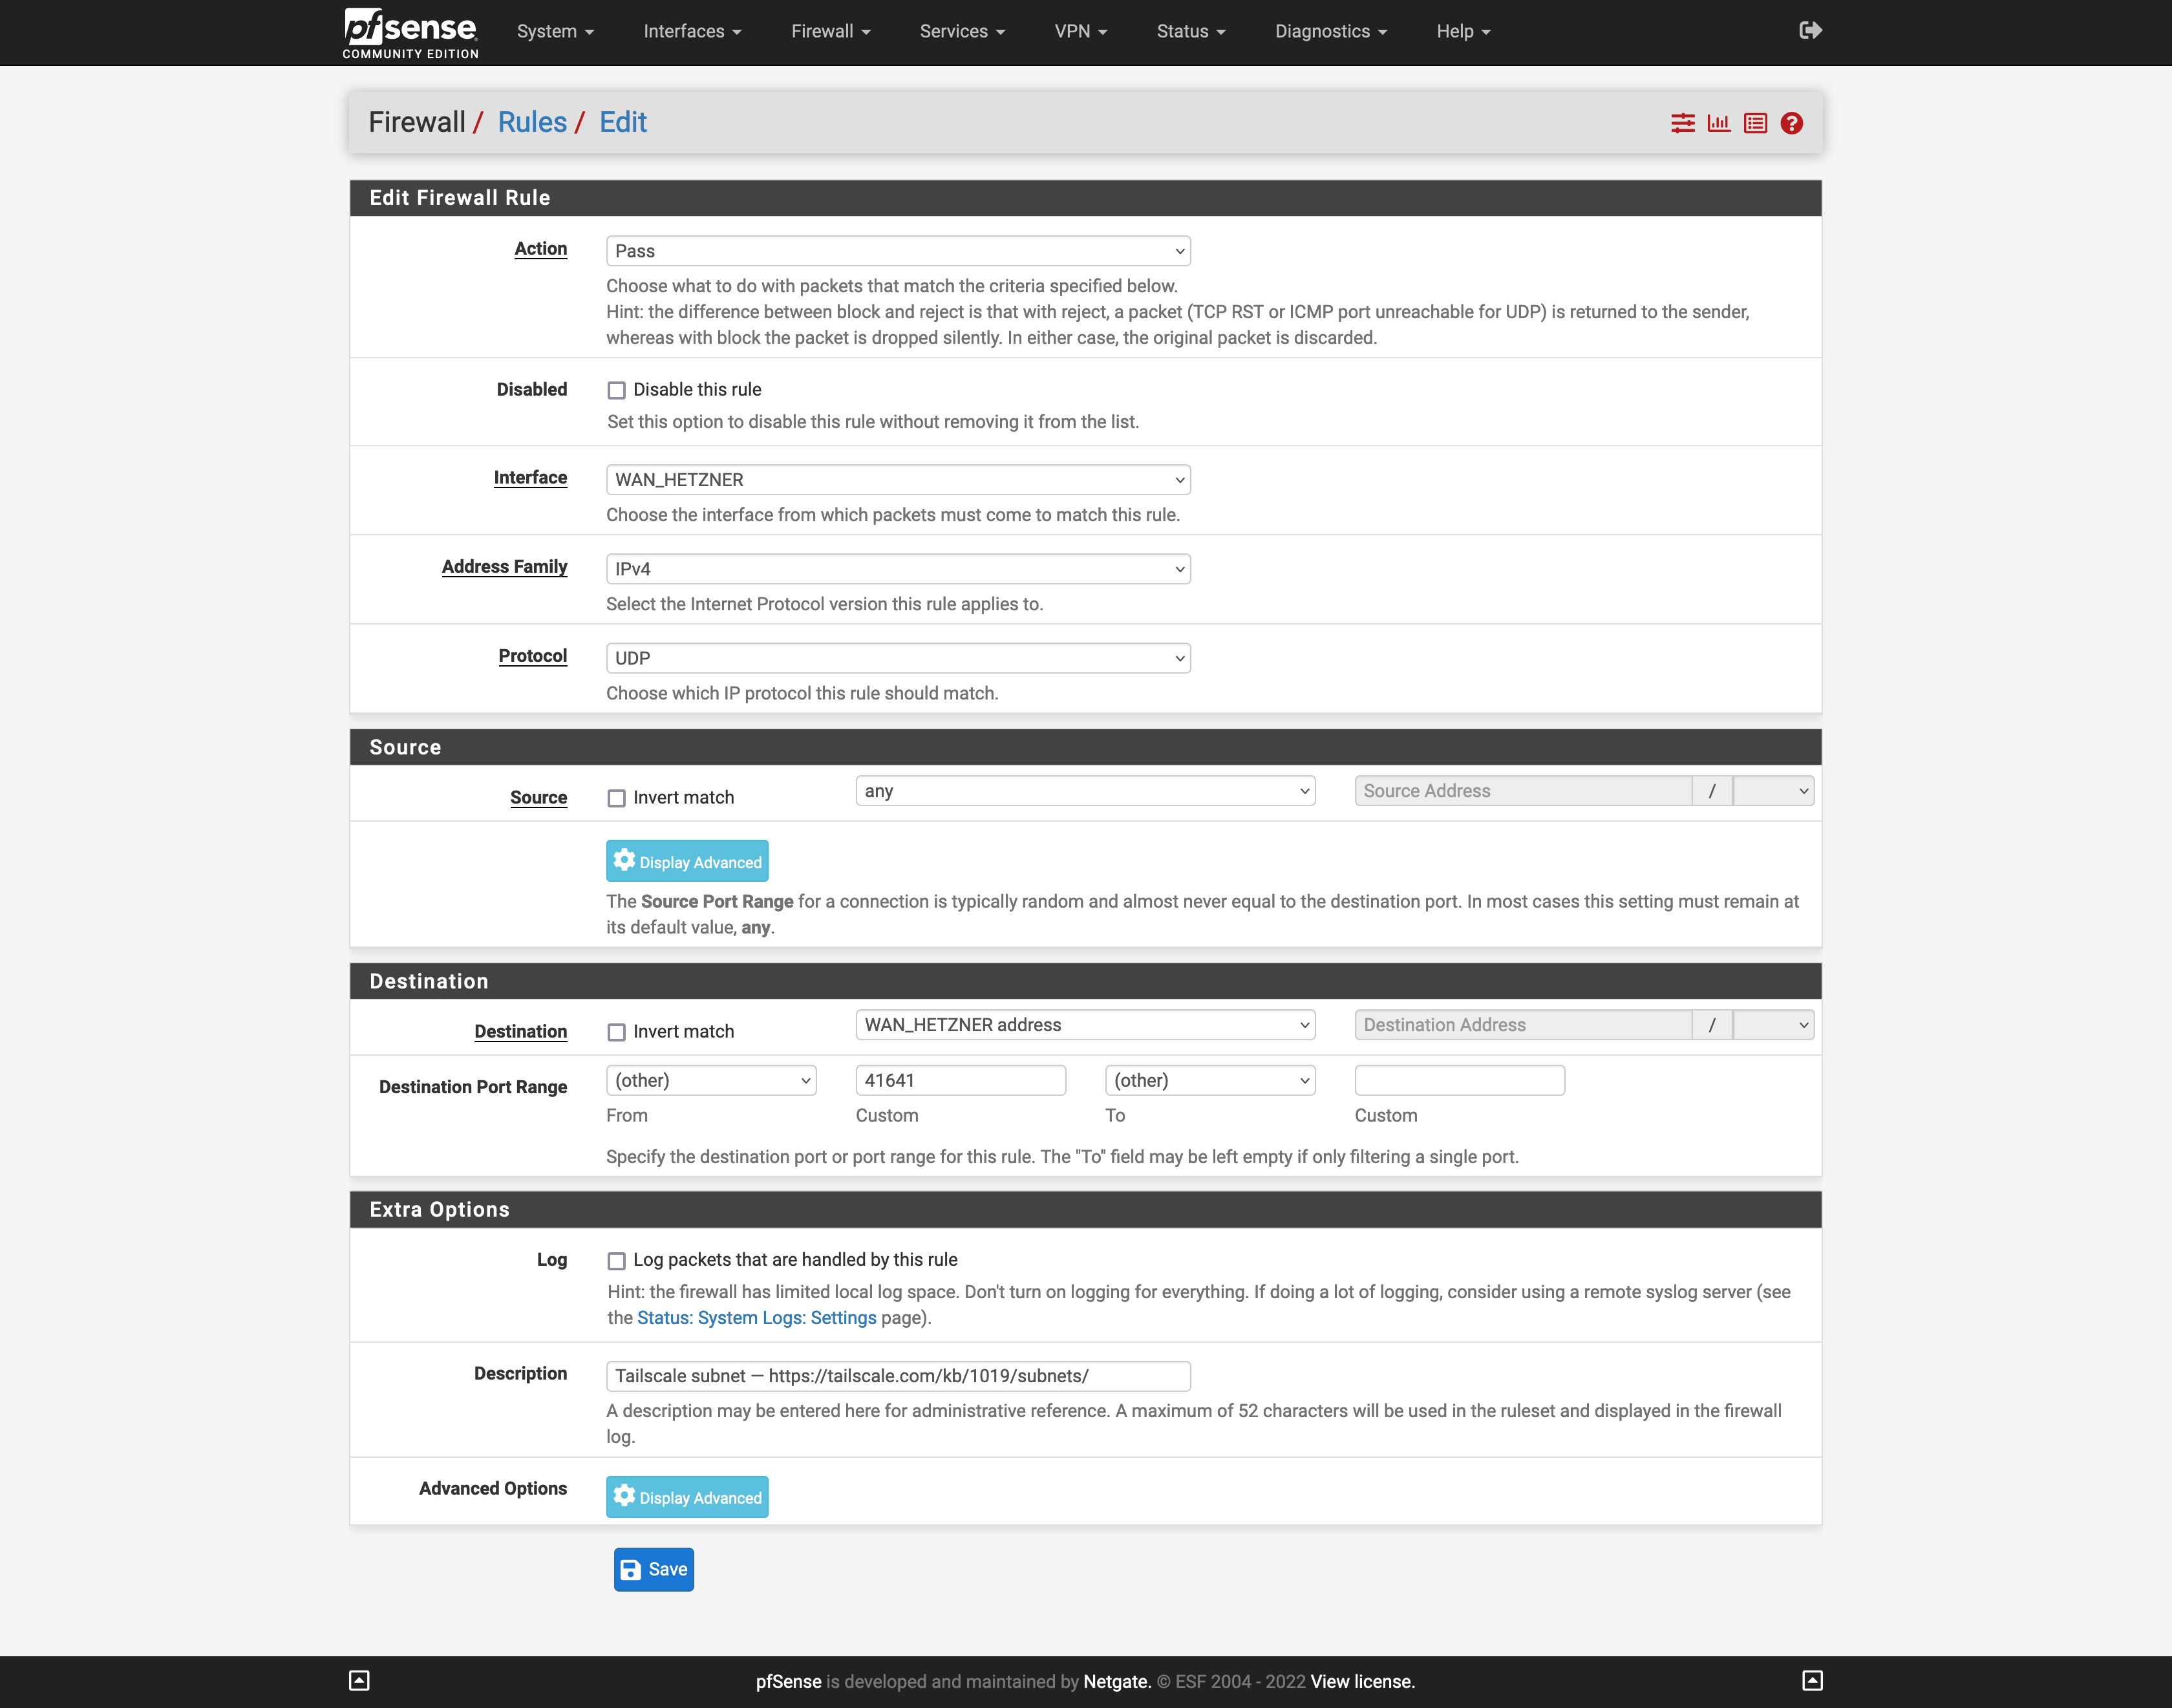
Add an ingress firewall rule on your WAN for 41641/UDP, which will allow you to reach your servers directly, without the need of a DERP server.
Key generation
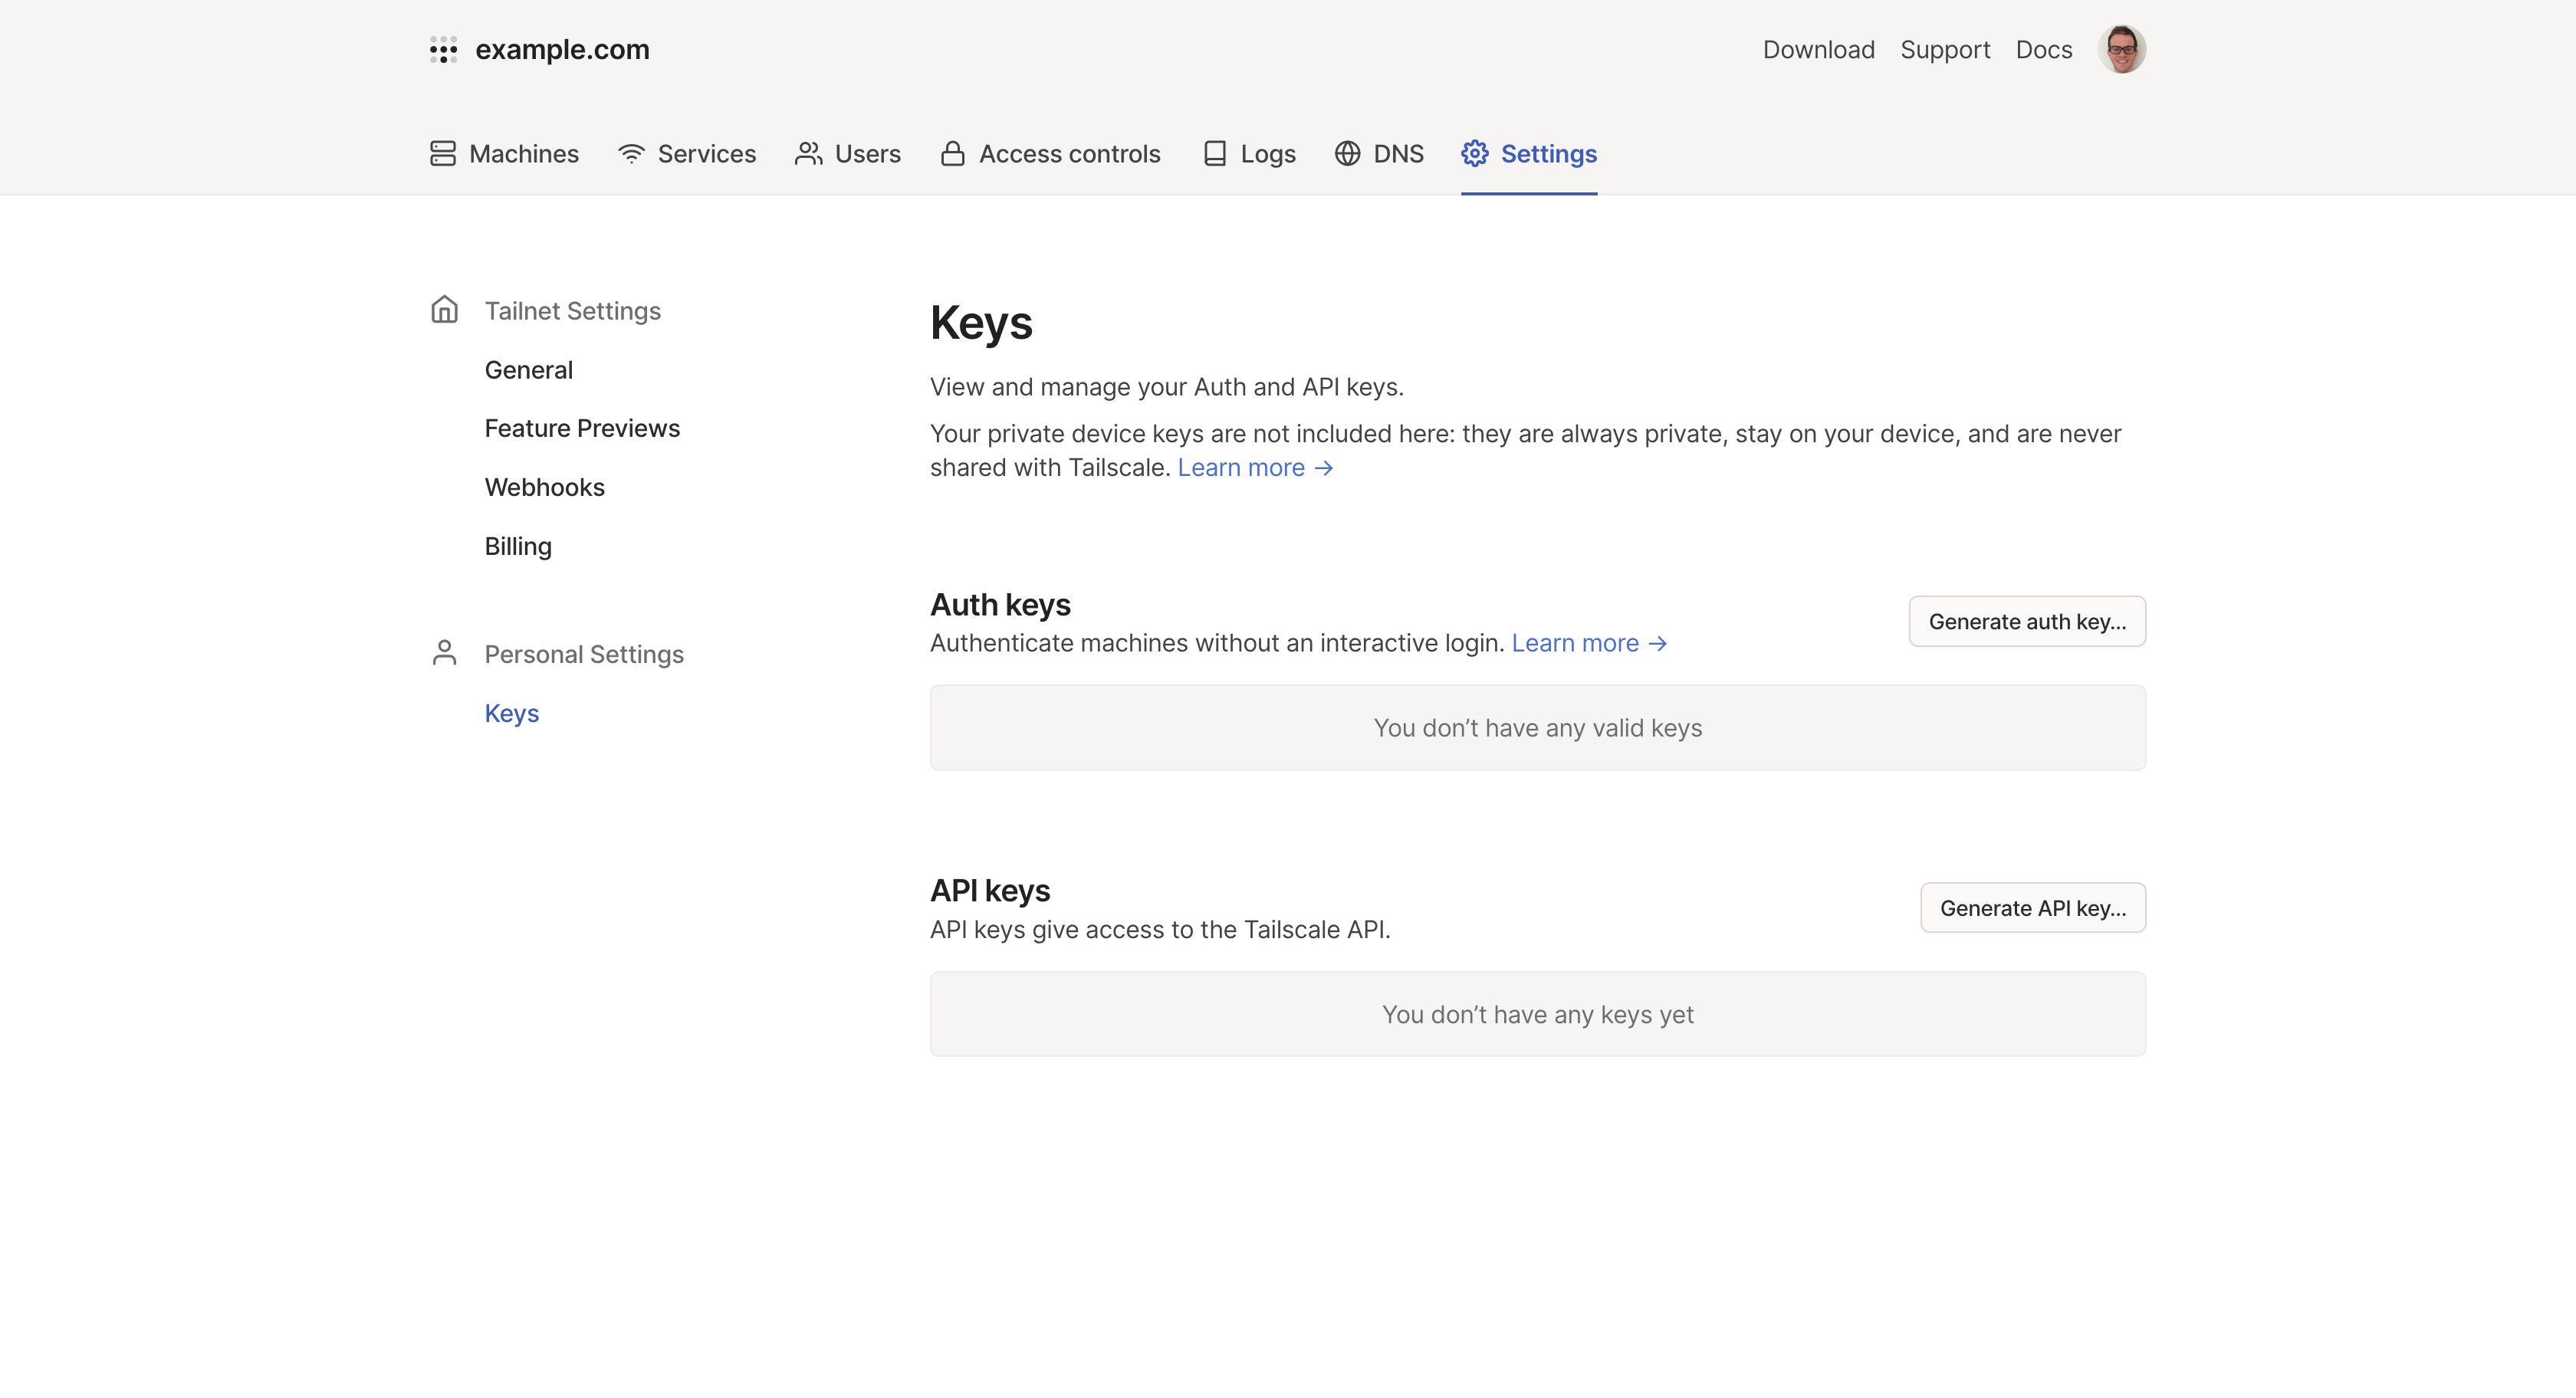
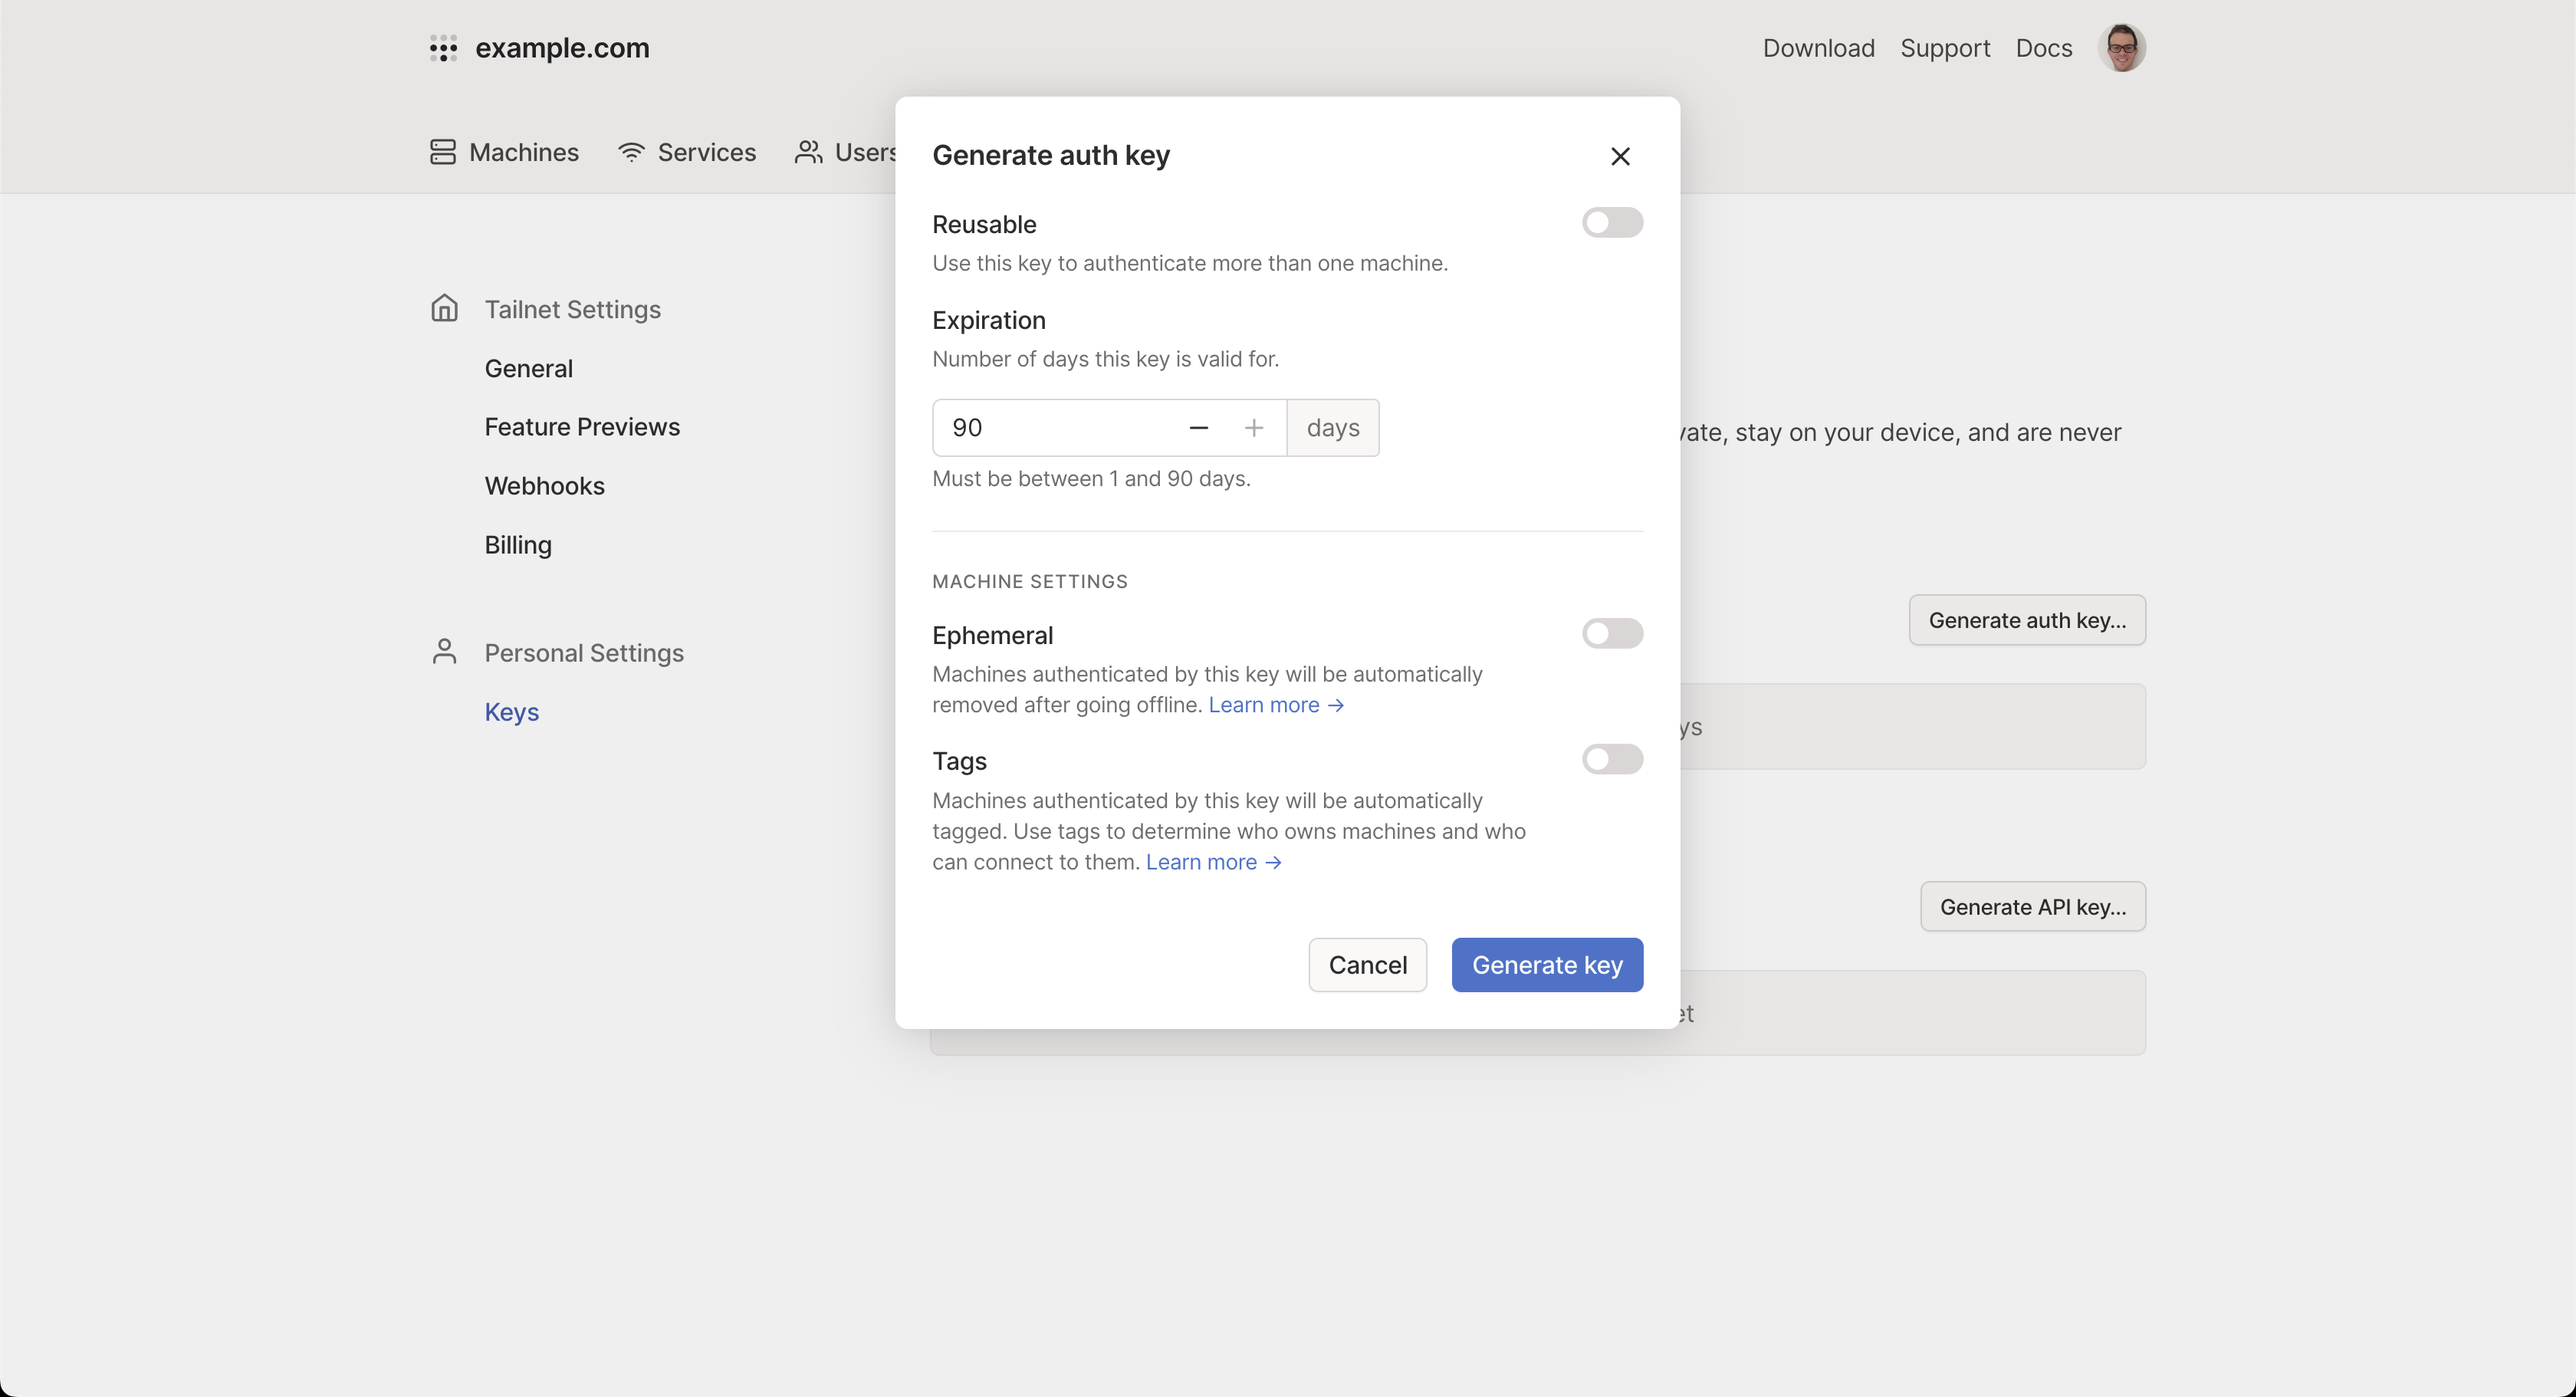
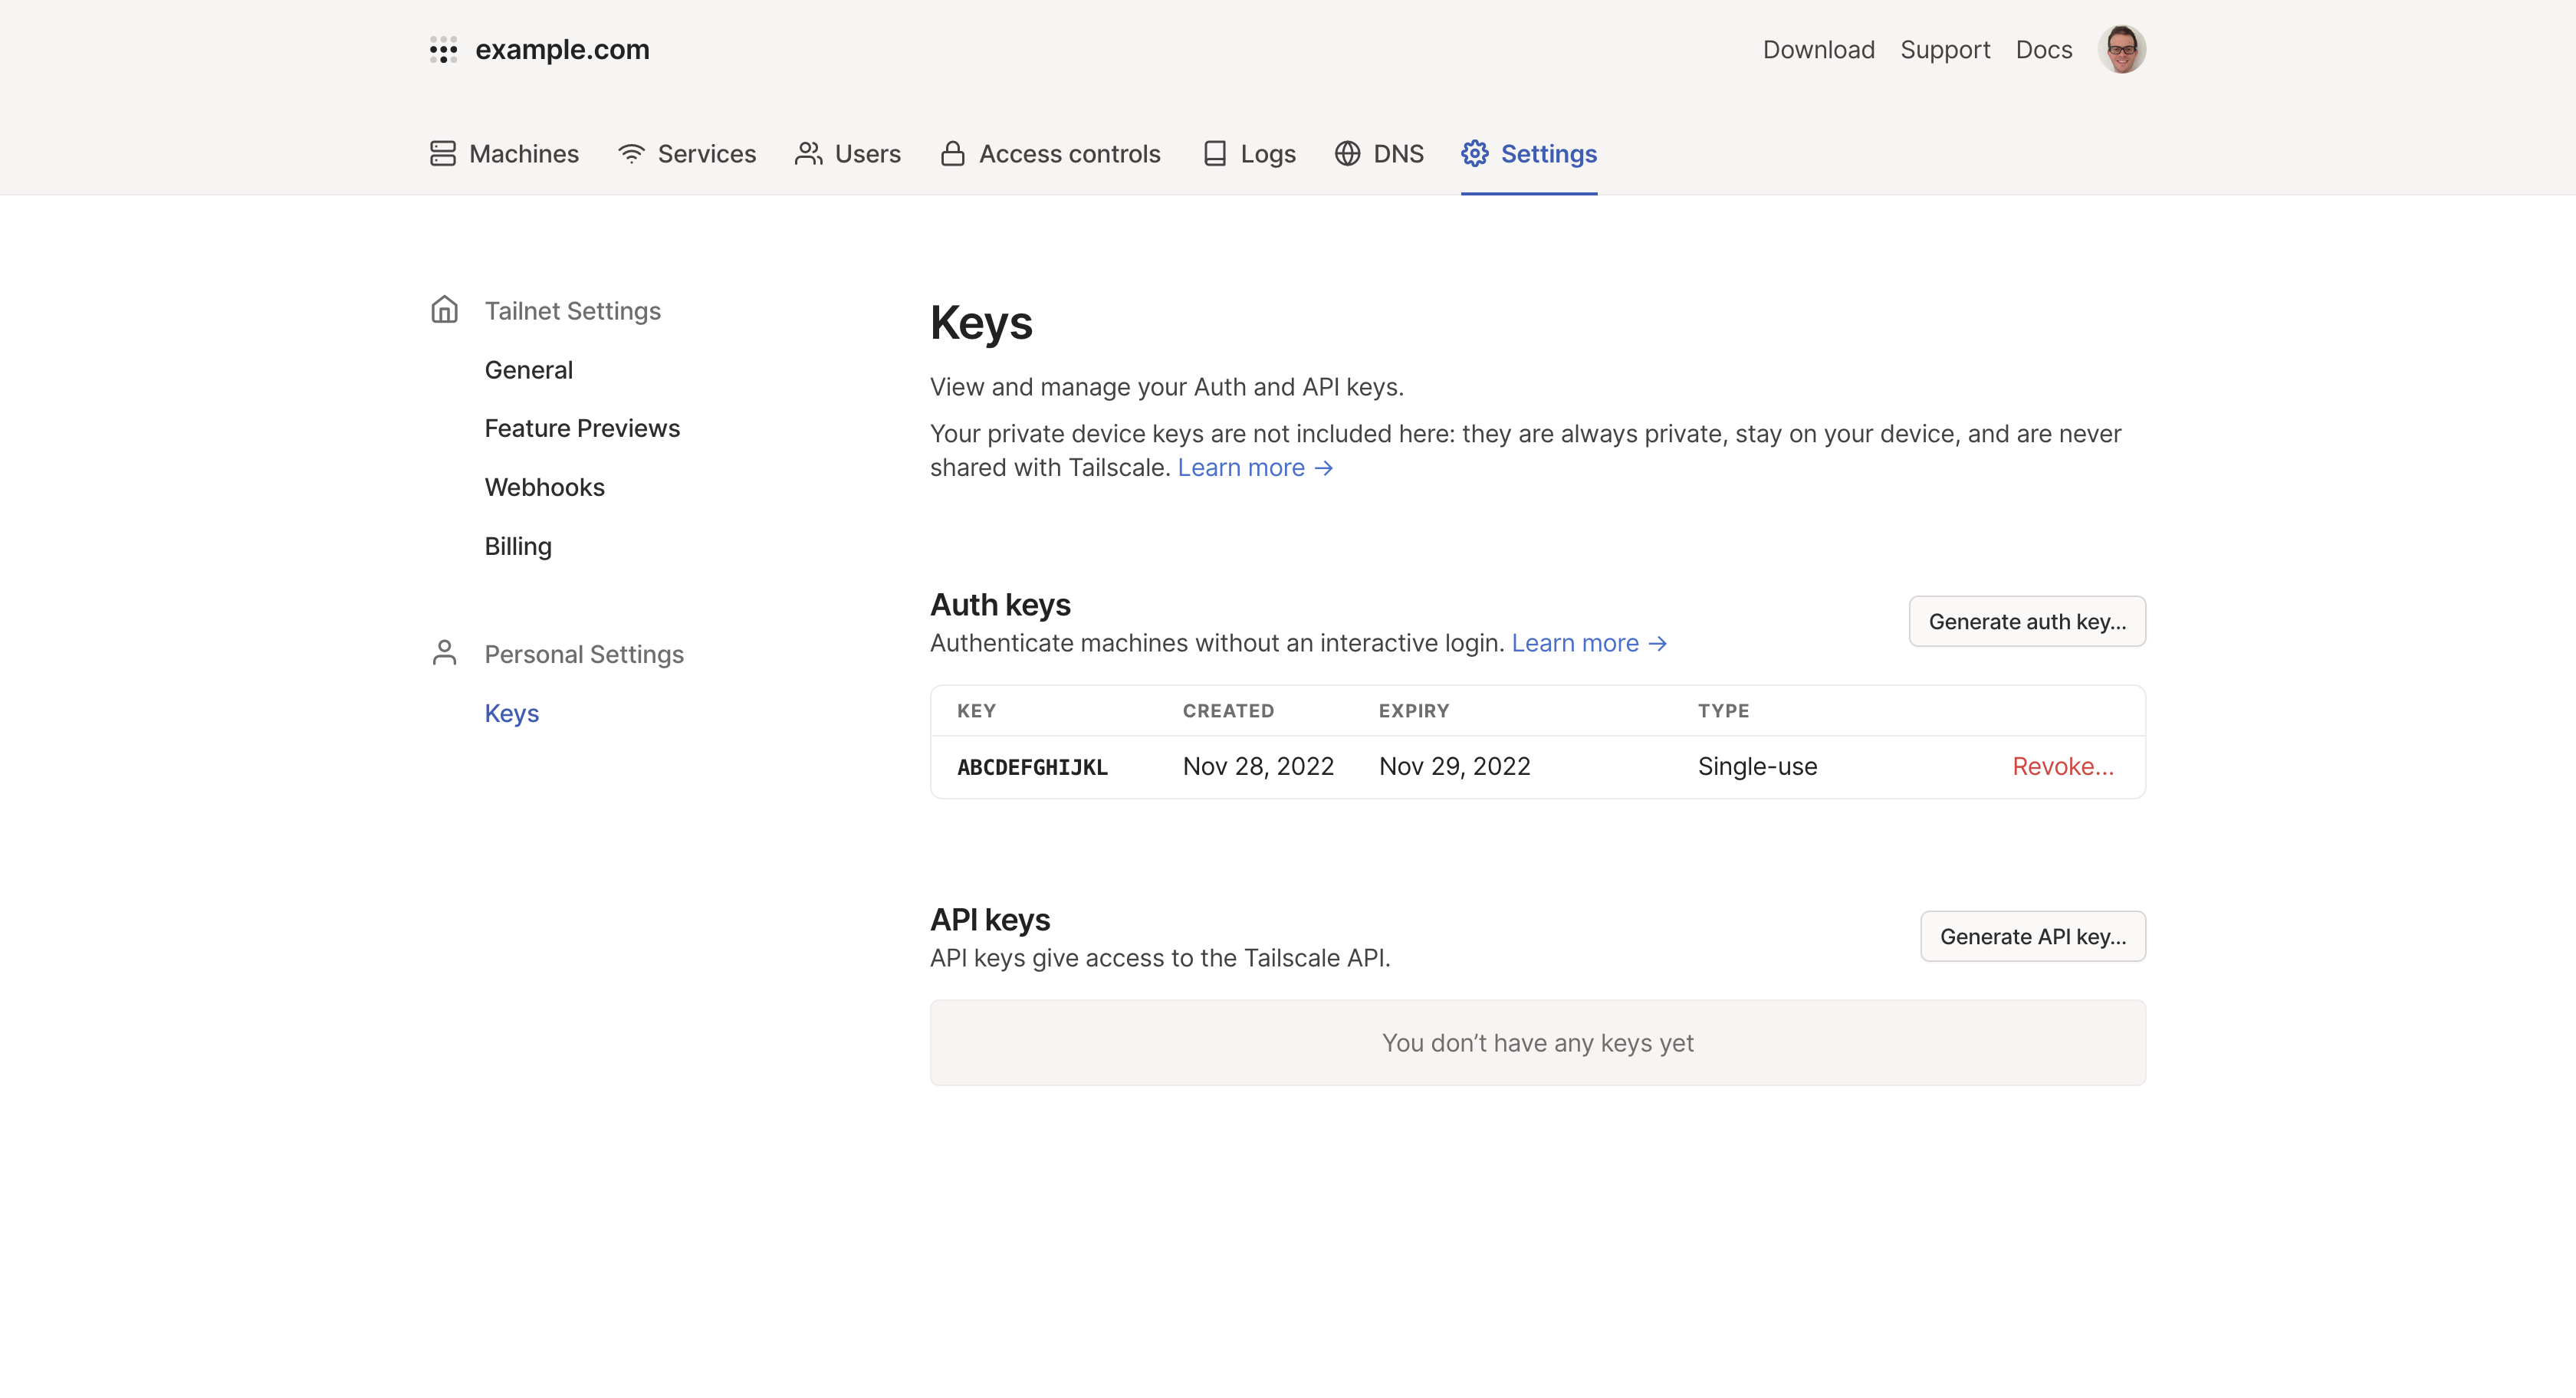
After you login to Tailscale, click on Settings → Keys → Generate auth key. At the time of writing, the default values should be fine. The generated key will be shown once, be sure to save it for a subsequent step which will be configured inside of the firewall.
Configuration

You can now configure Tailscale by clicking on VPN → Tailscale
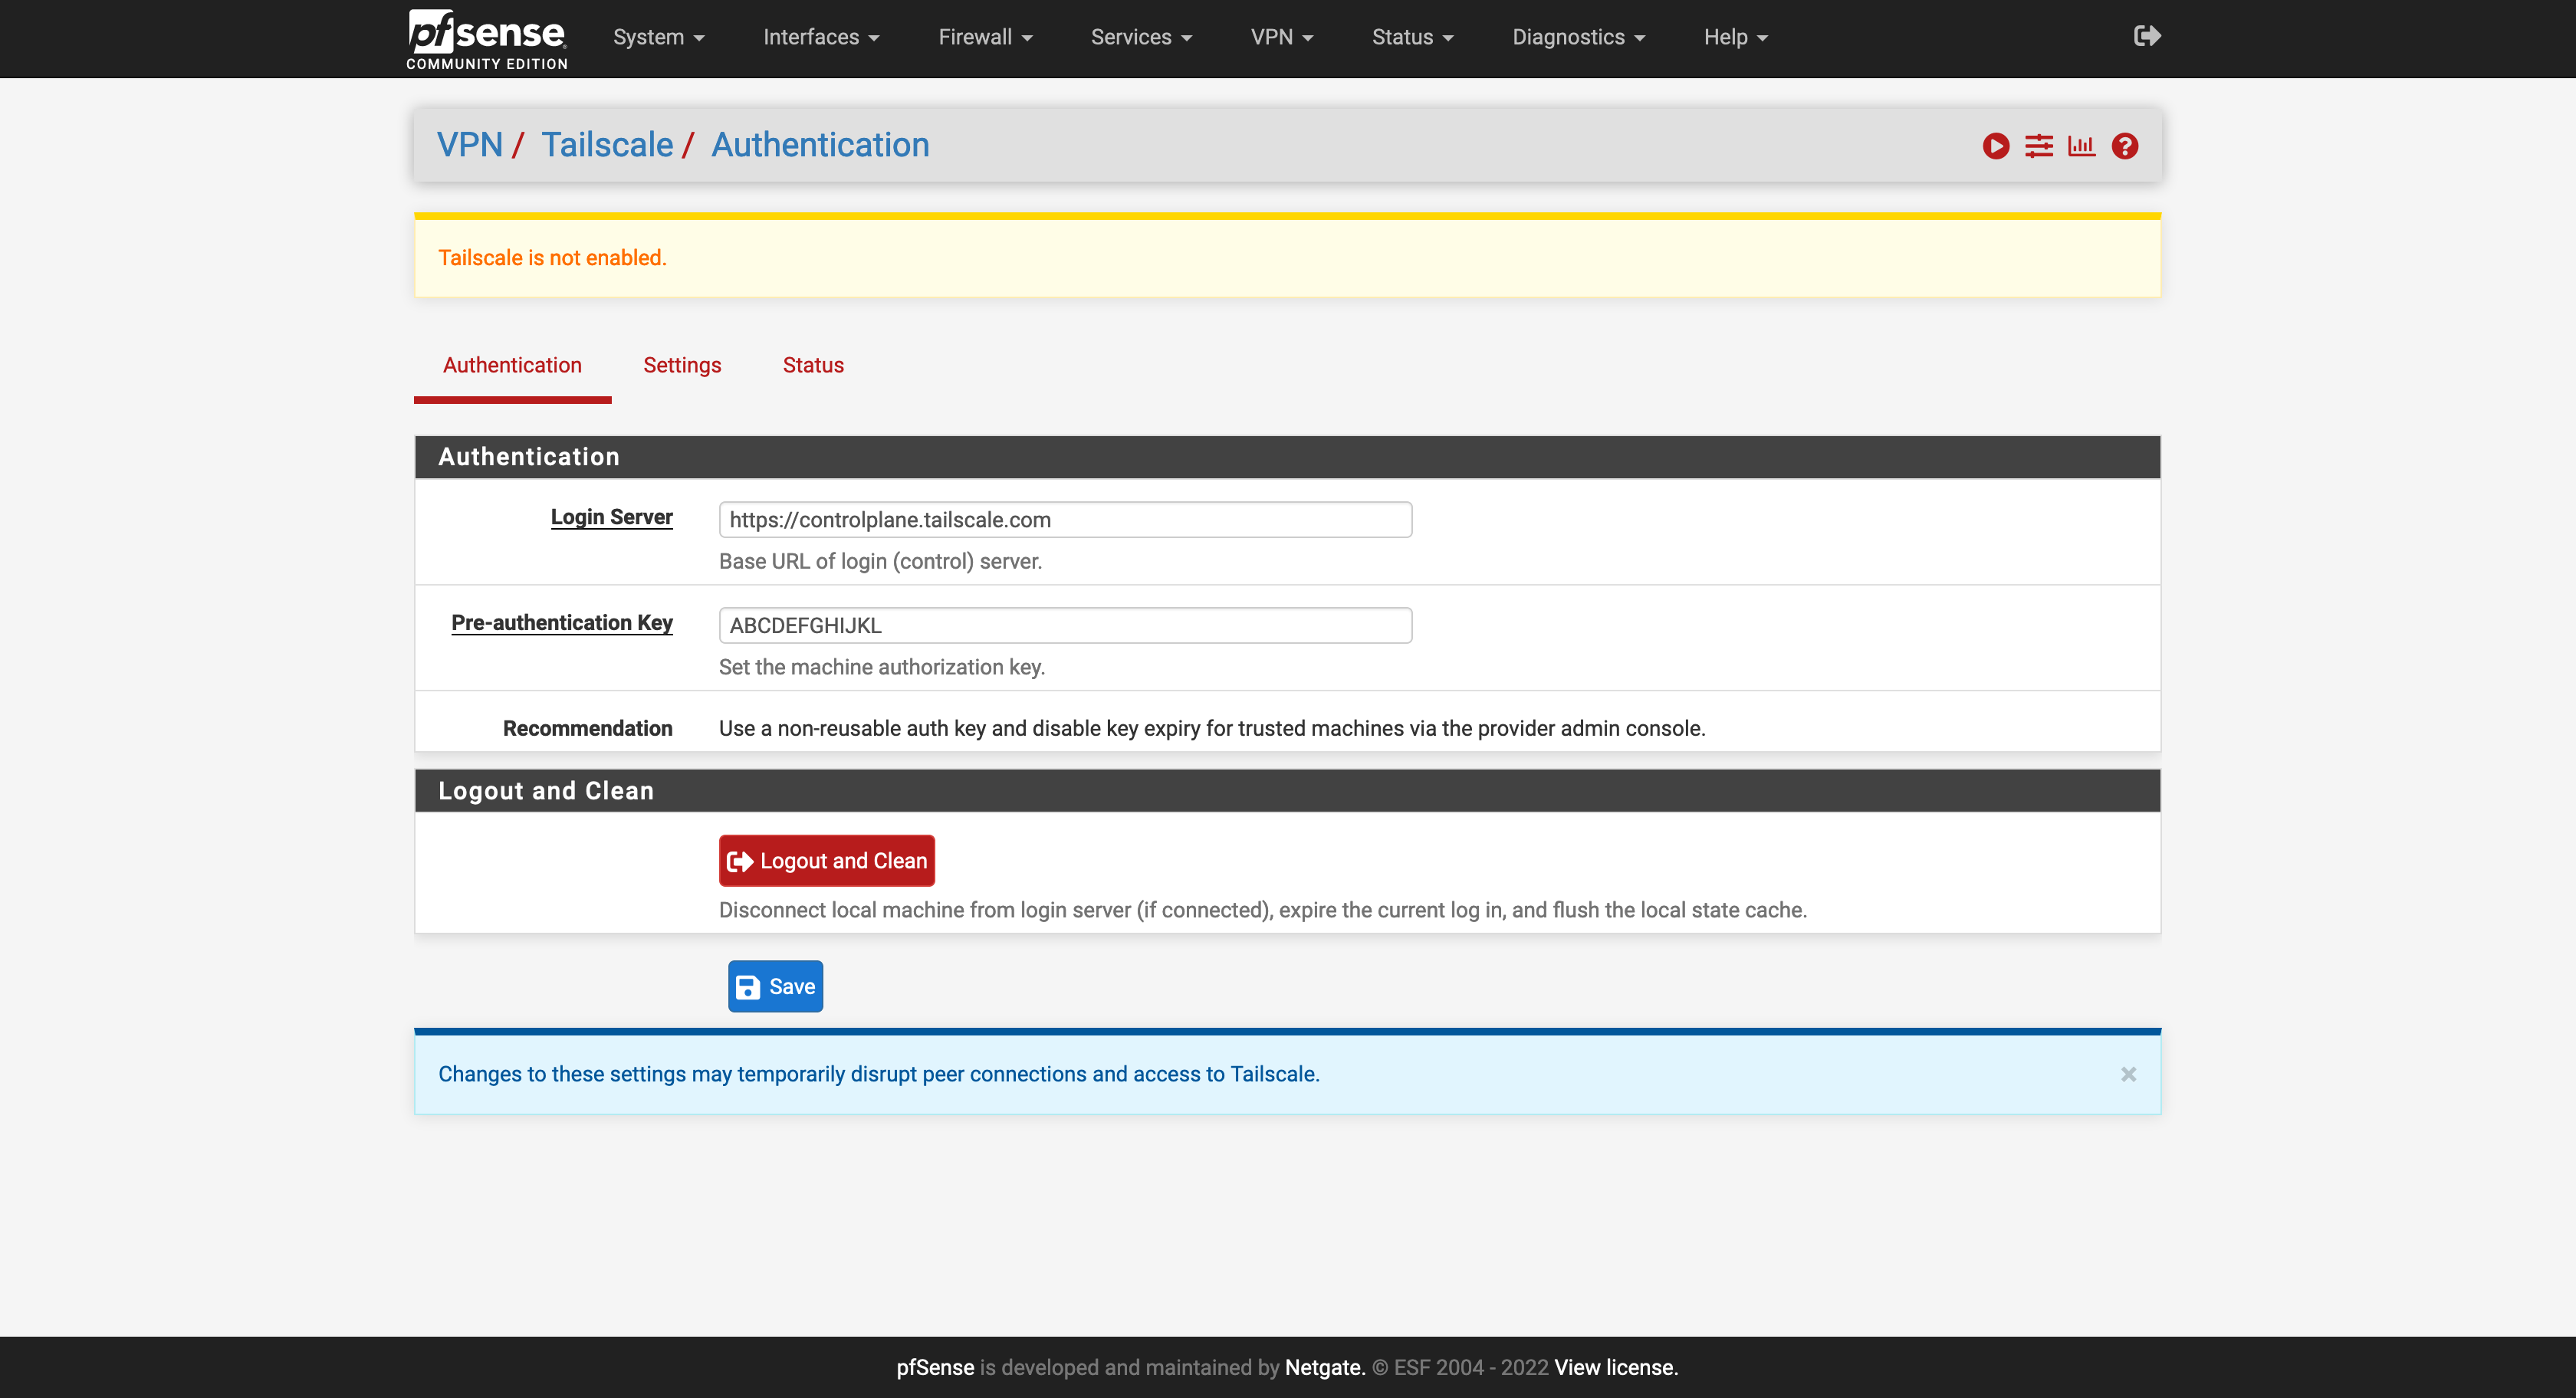
Click on Authentication and add your generated key from Tailscale.
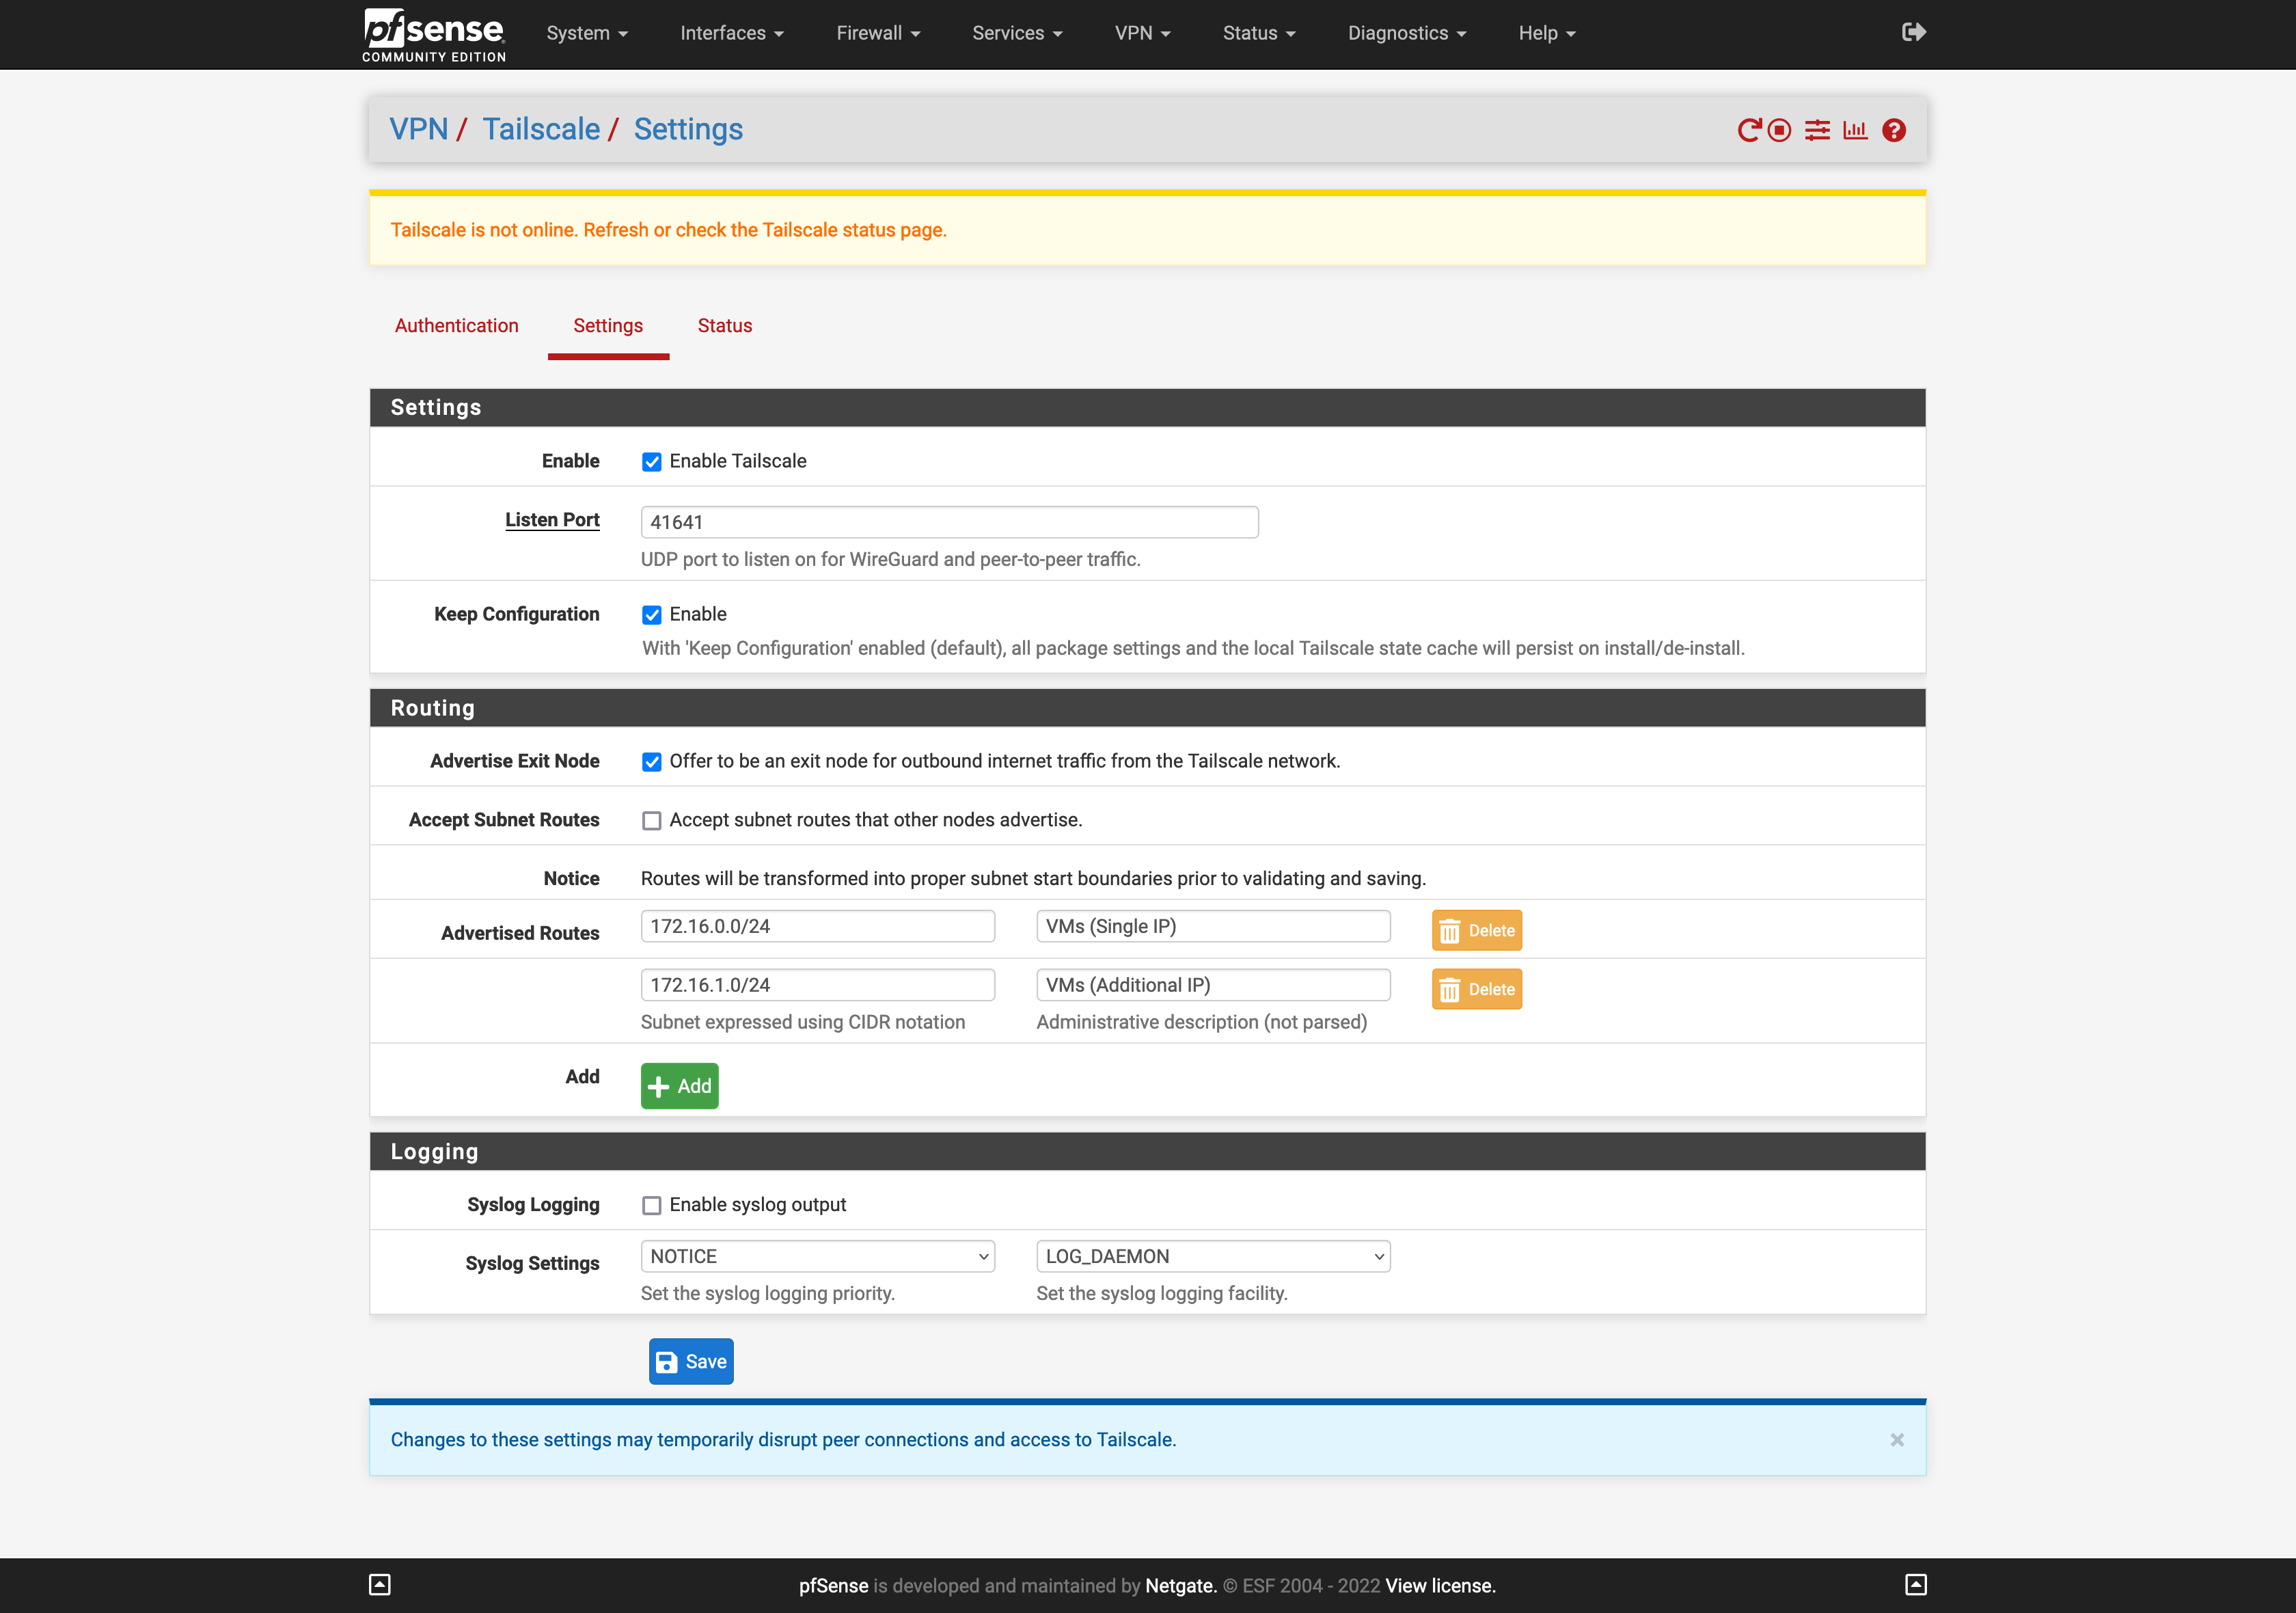
Now enable Tailscale, enable Advertising Exit Node, and add Advertised Routes to the two LANs for Virtual Machines on the primary IP and the Virtual Machines on the secondary IP. Once you’re finished, click on the Save button:
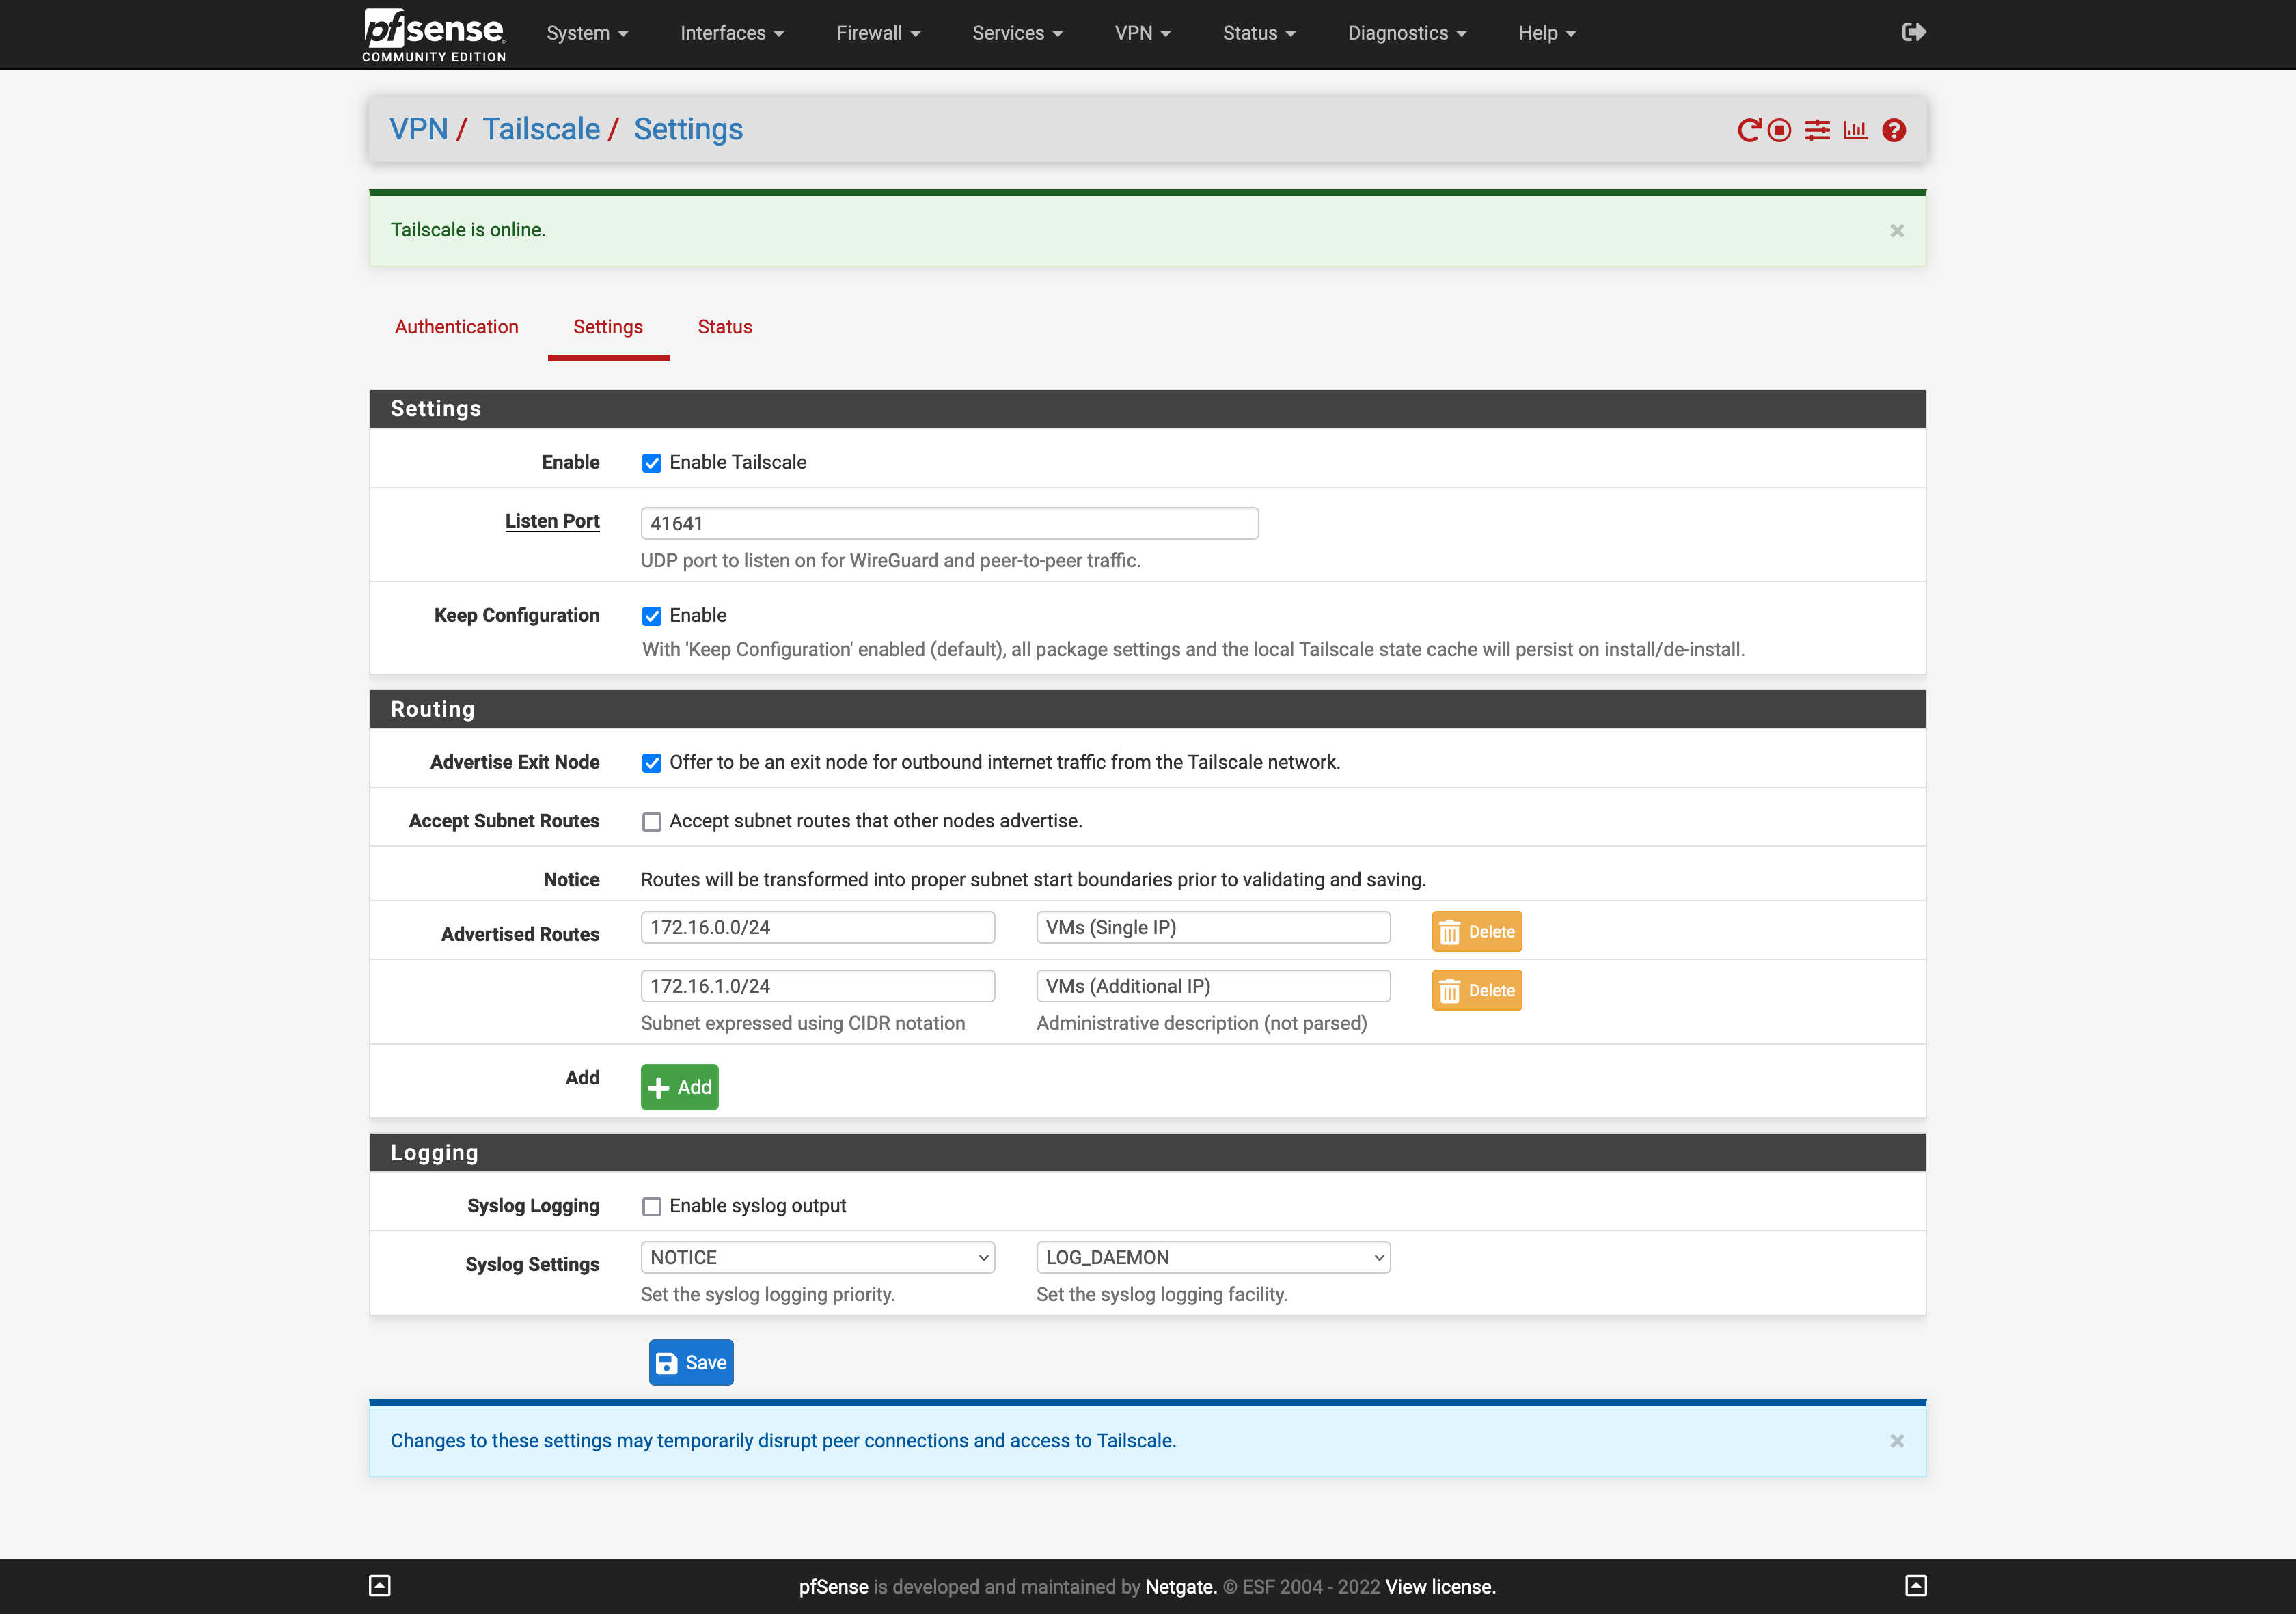
You should now see your firewall listed in the Tailscale Machine list.
NAT outbound
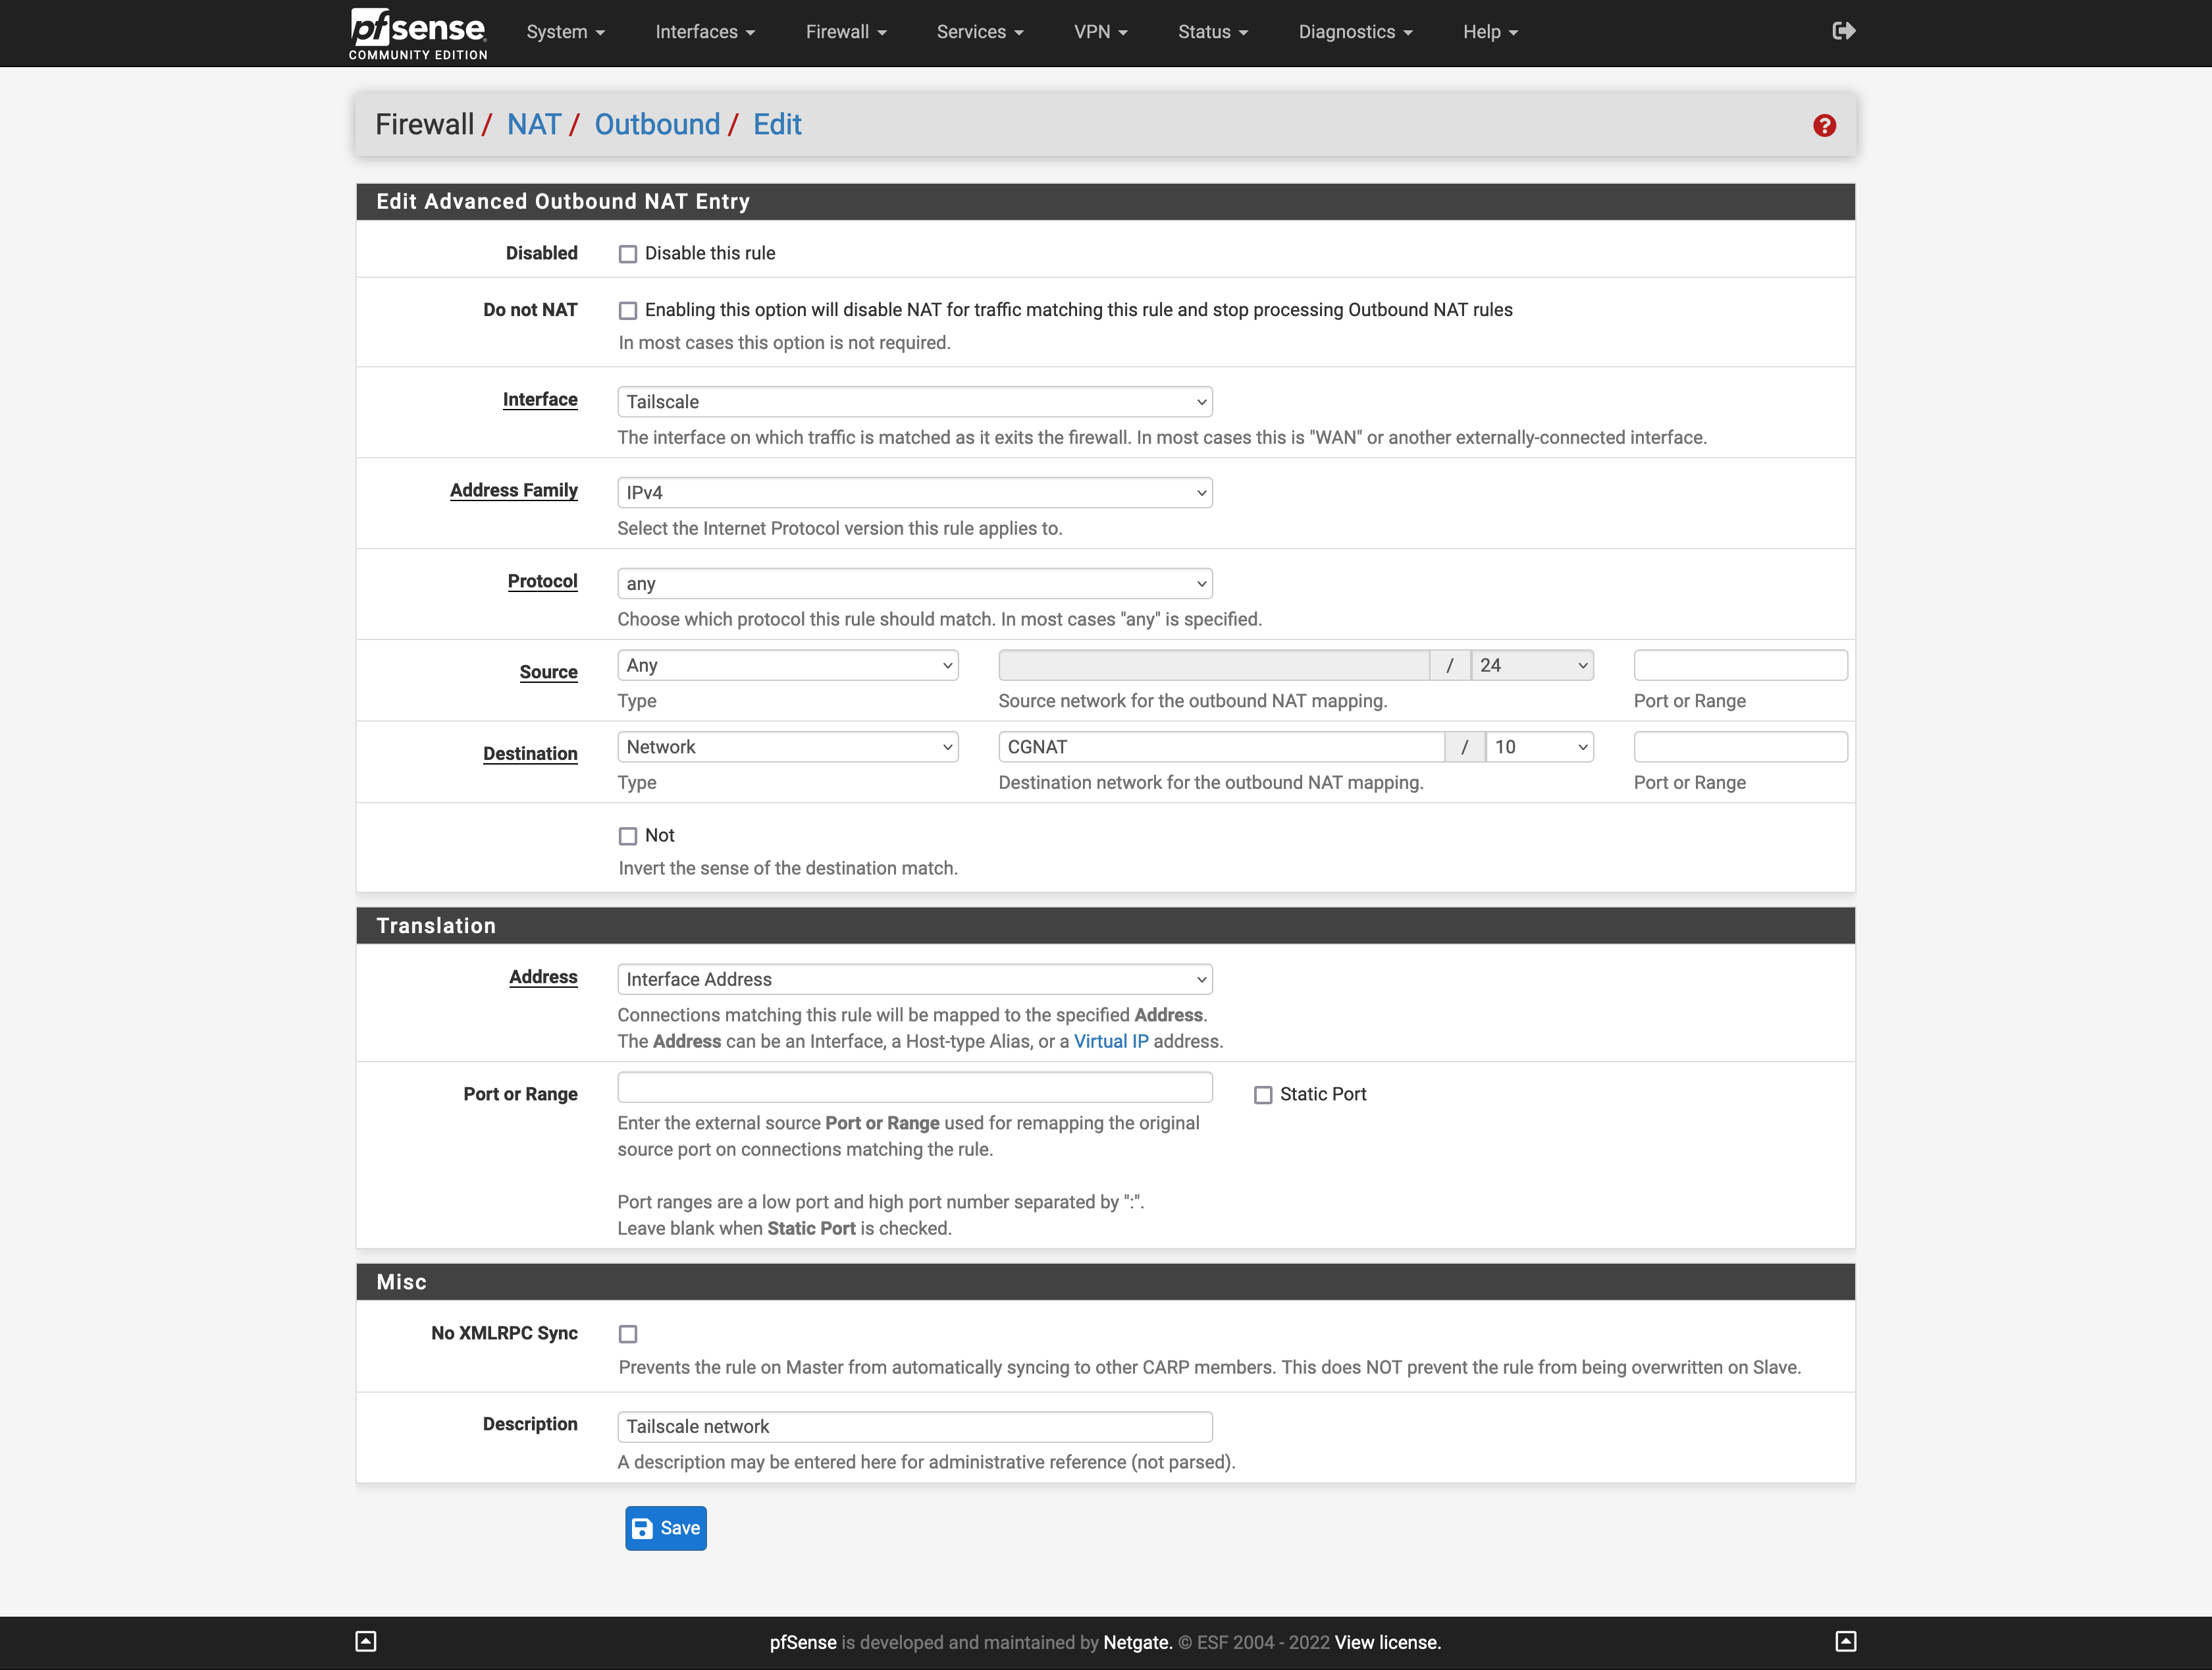
Set an outbound NAT entry for Tailscale by clicking on Firewall → NAT → Outbound → Add
Activation
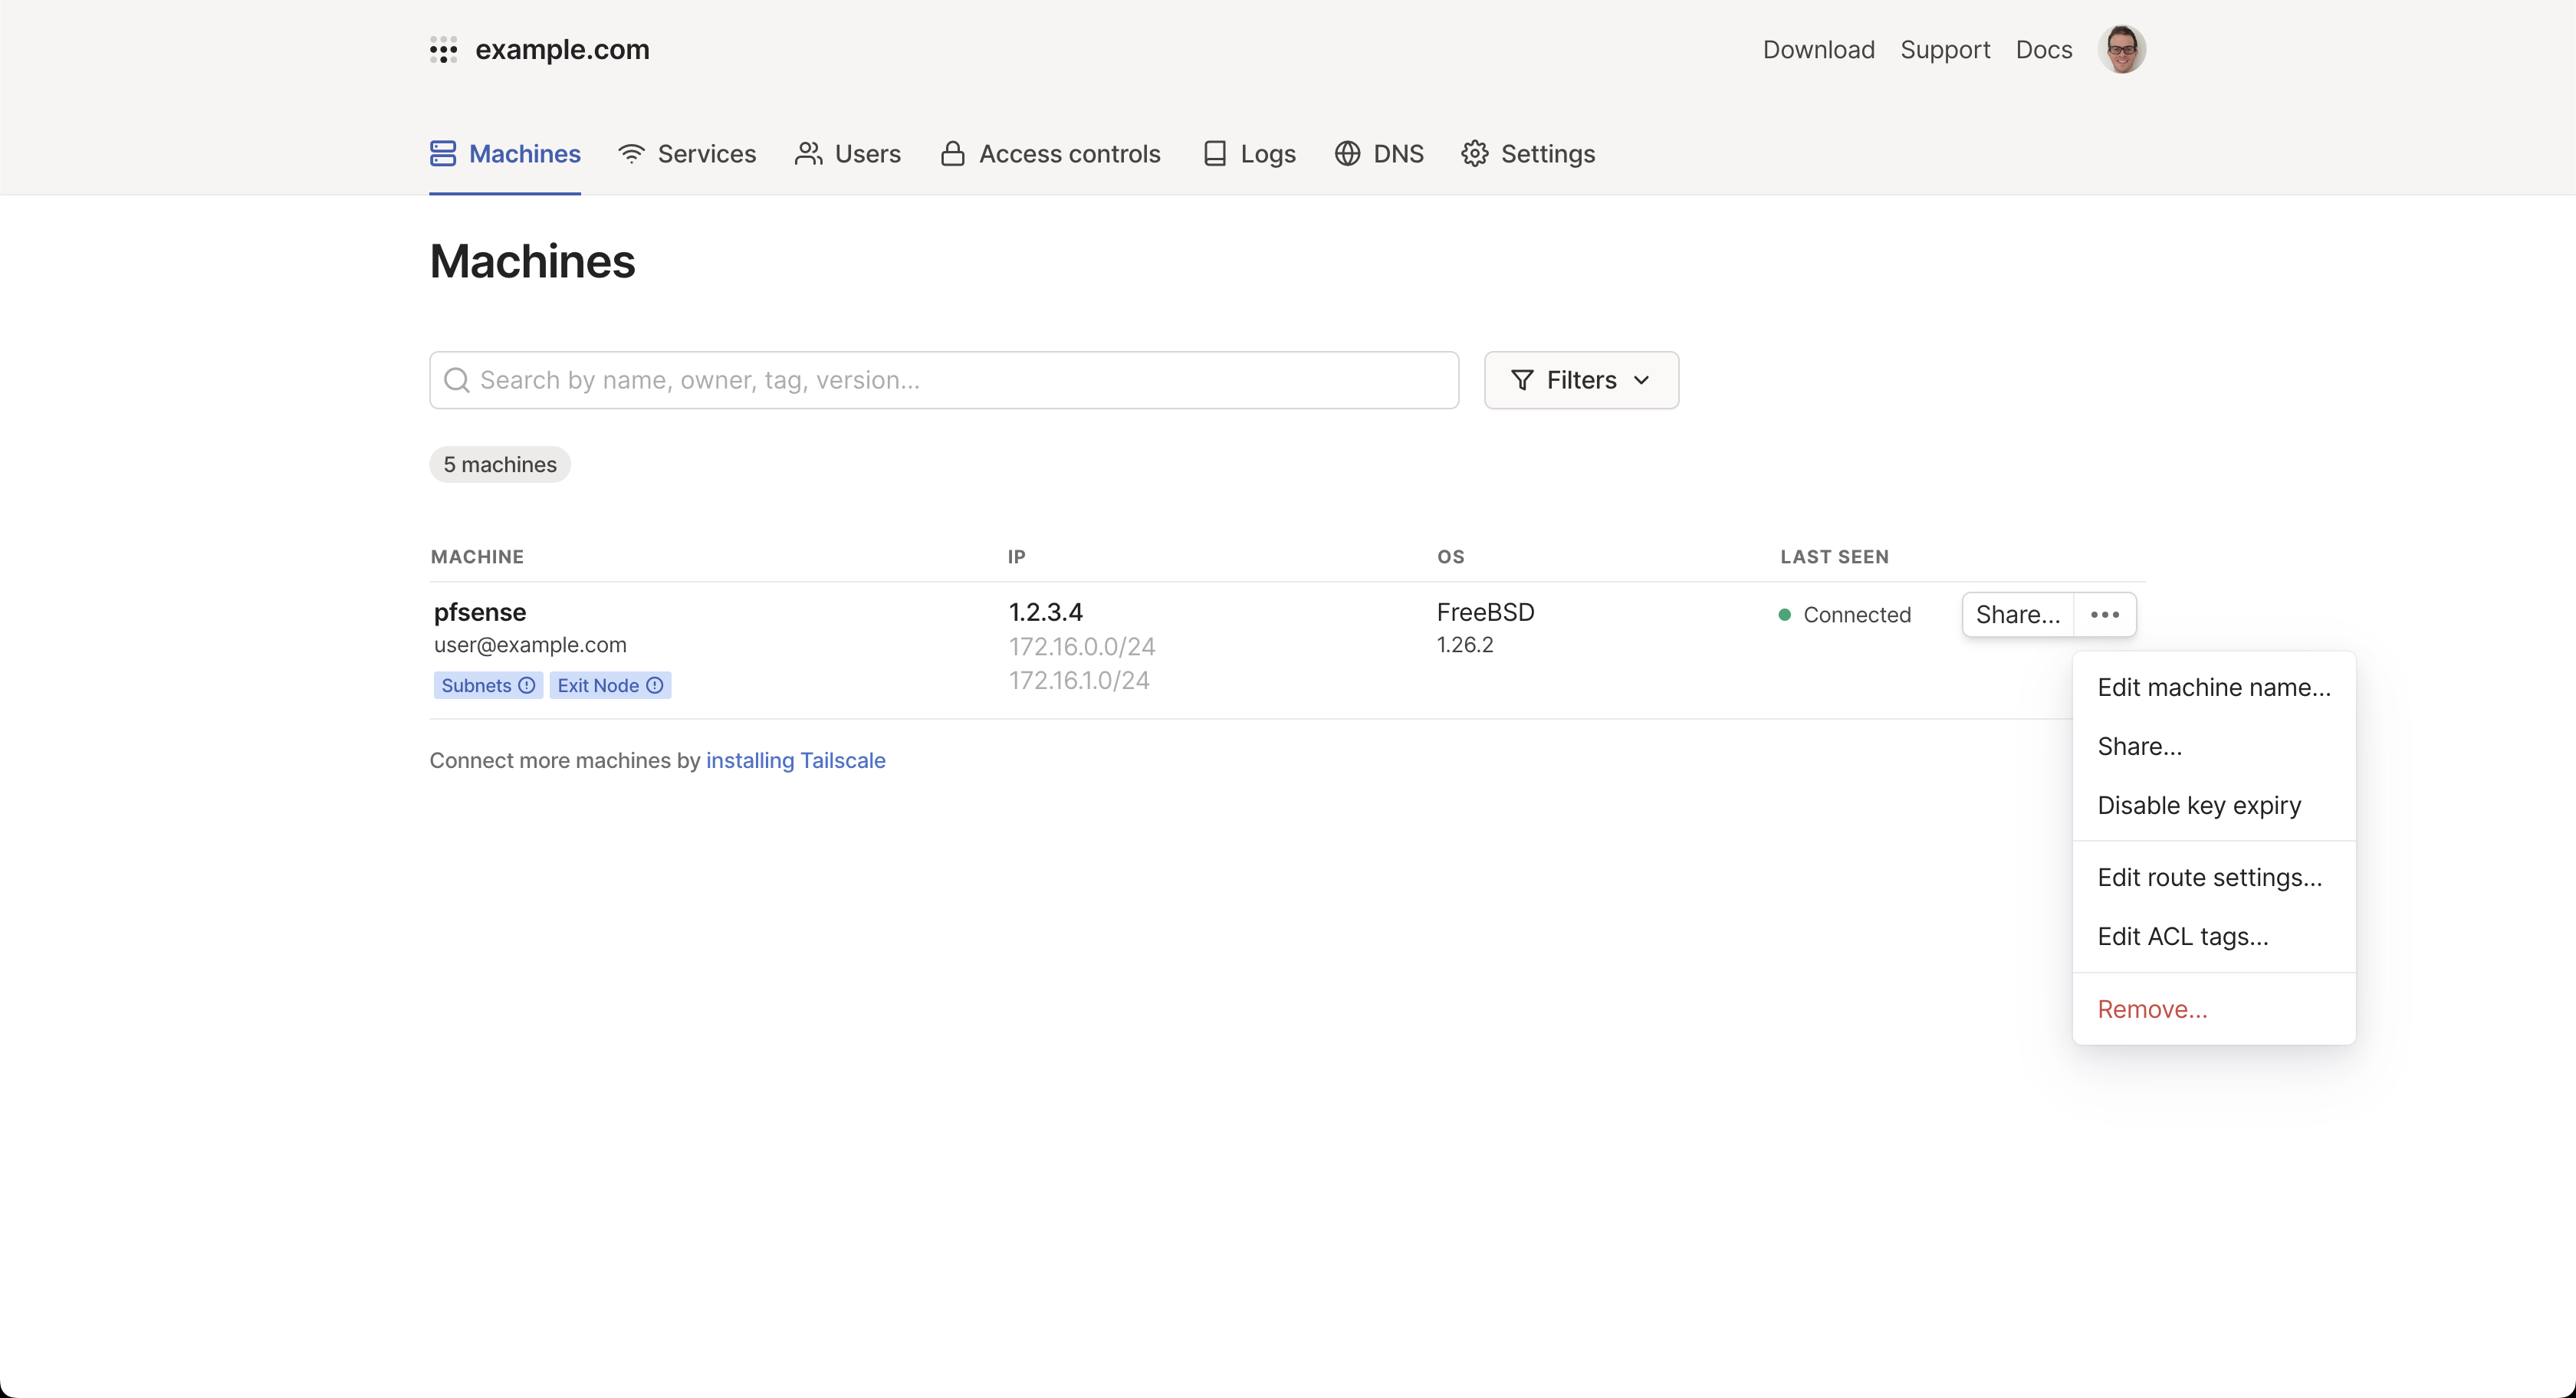
Click on the three dots on the far right of the firewall. First, click on Disable key expiry. Then, click on Edit route settings…
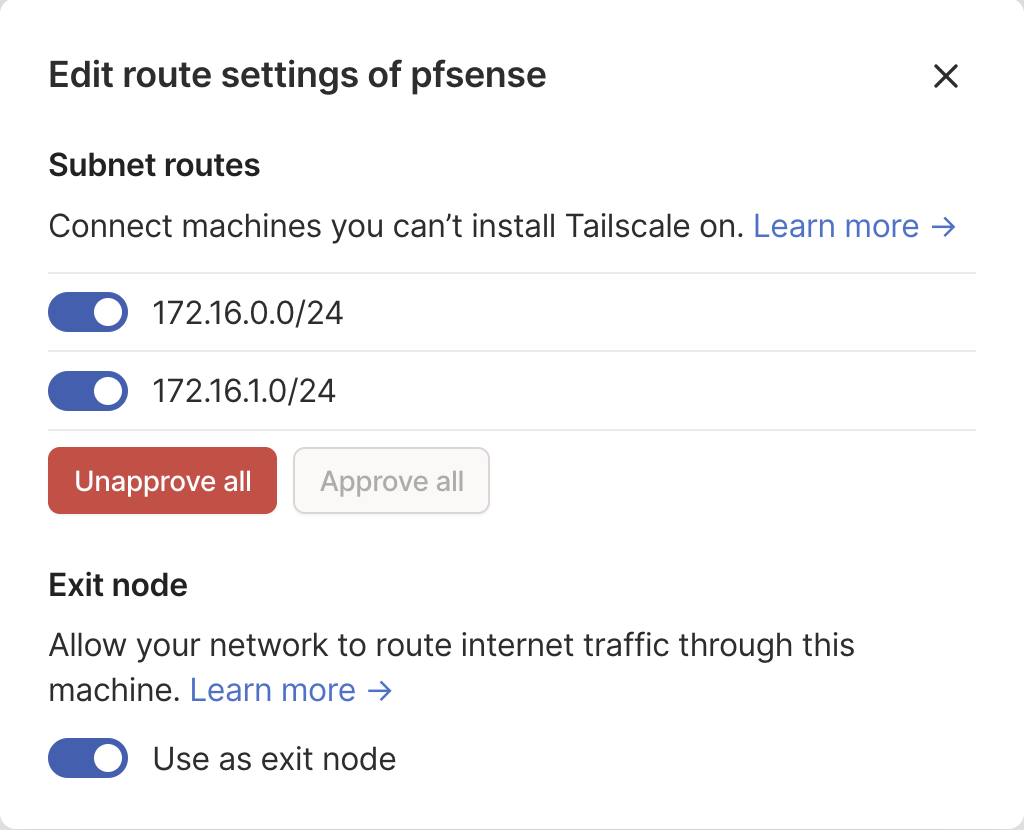
Enable the two Subnet routes (Virtual Machines for the Primary and Additional networks) and enable Exit node if you want the ability to tunnel your computer through the server when you’re on a public Internet such as a coffee shop.
Now with Tailscale installed on your machine, you can access any of these Virtual Machines or Containers without needing to install the Tailscale client on each of them, and it will pass from your machine directly to your Proxmox firewall, and then directly to the Virtual Machines and Containers.
Pitfall
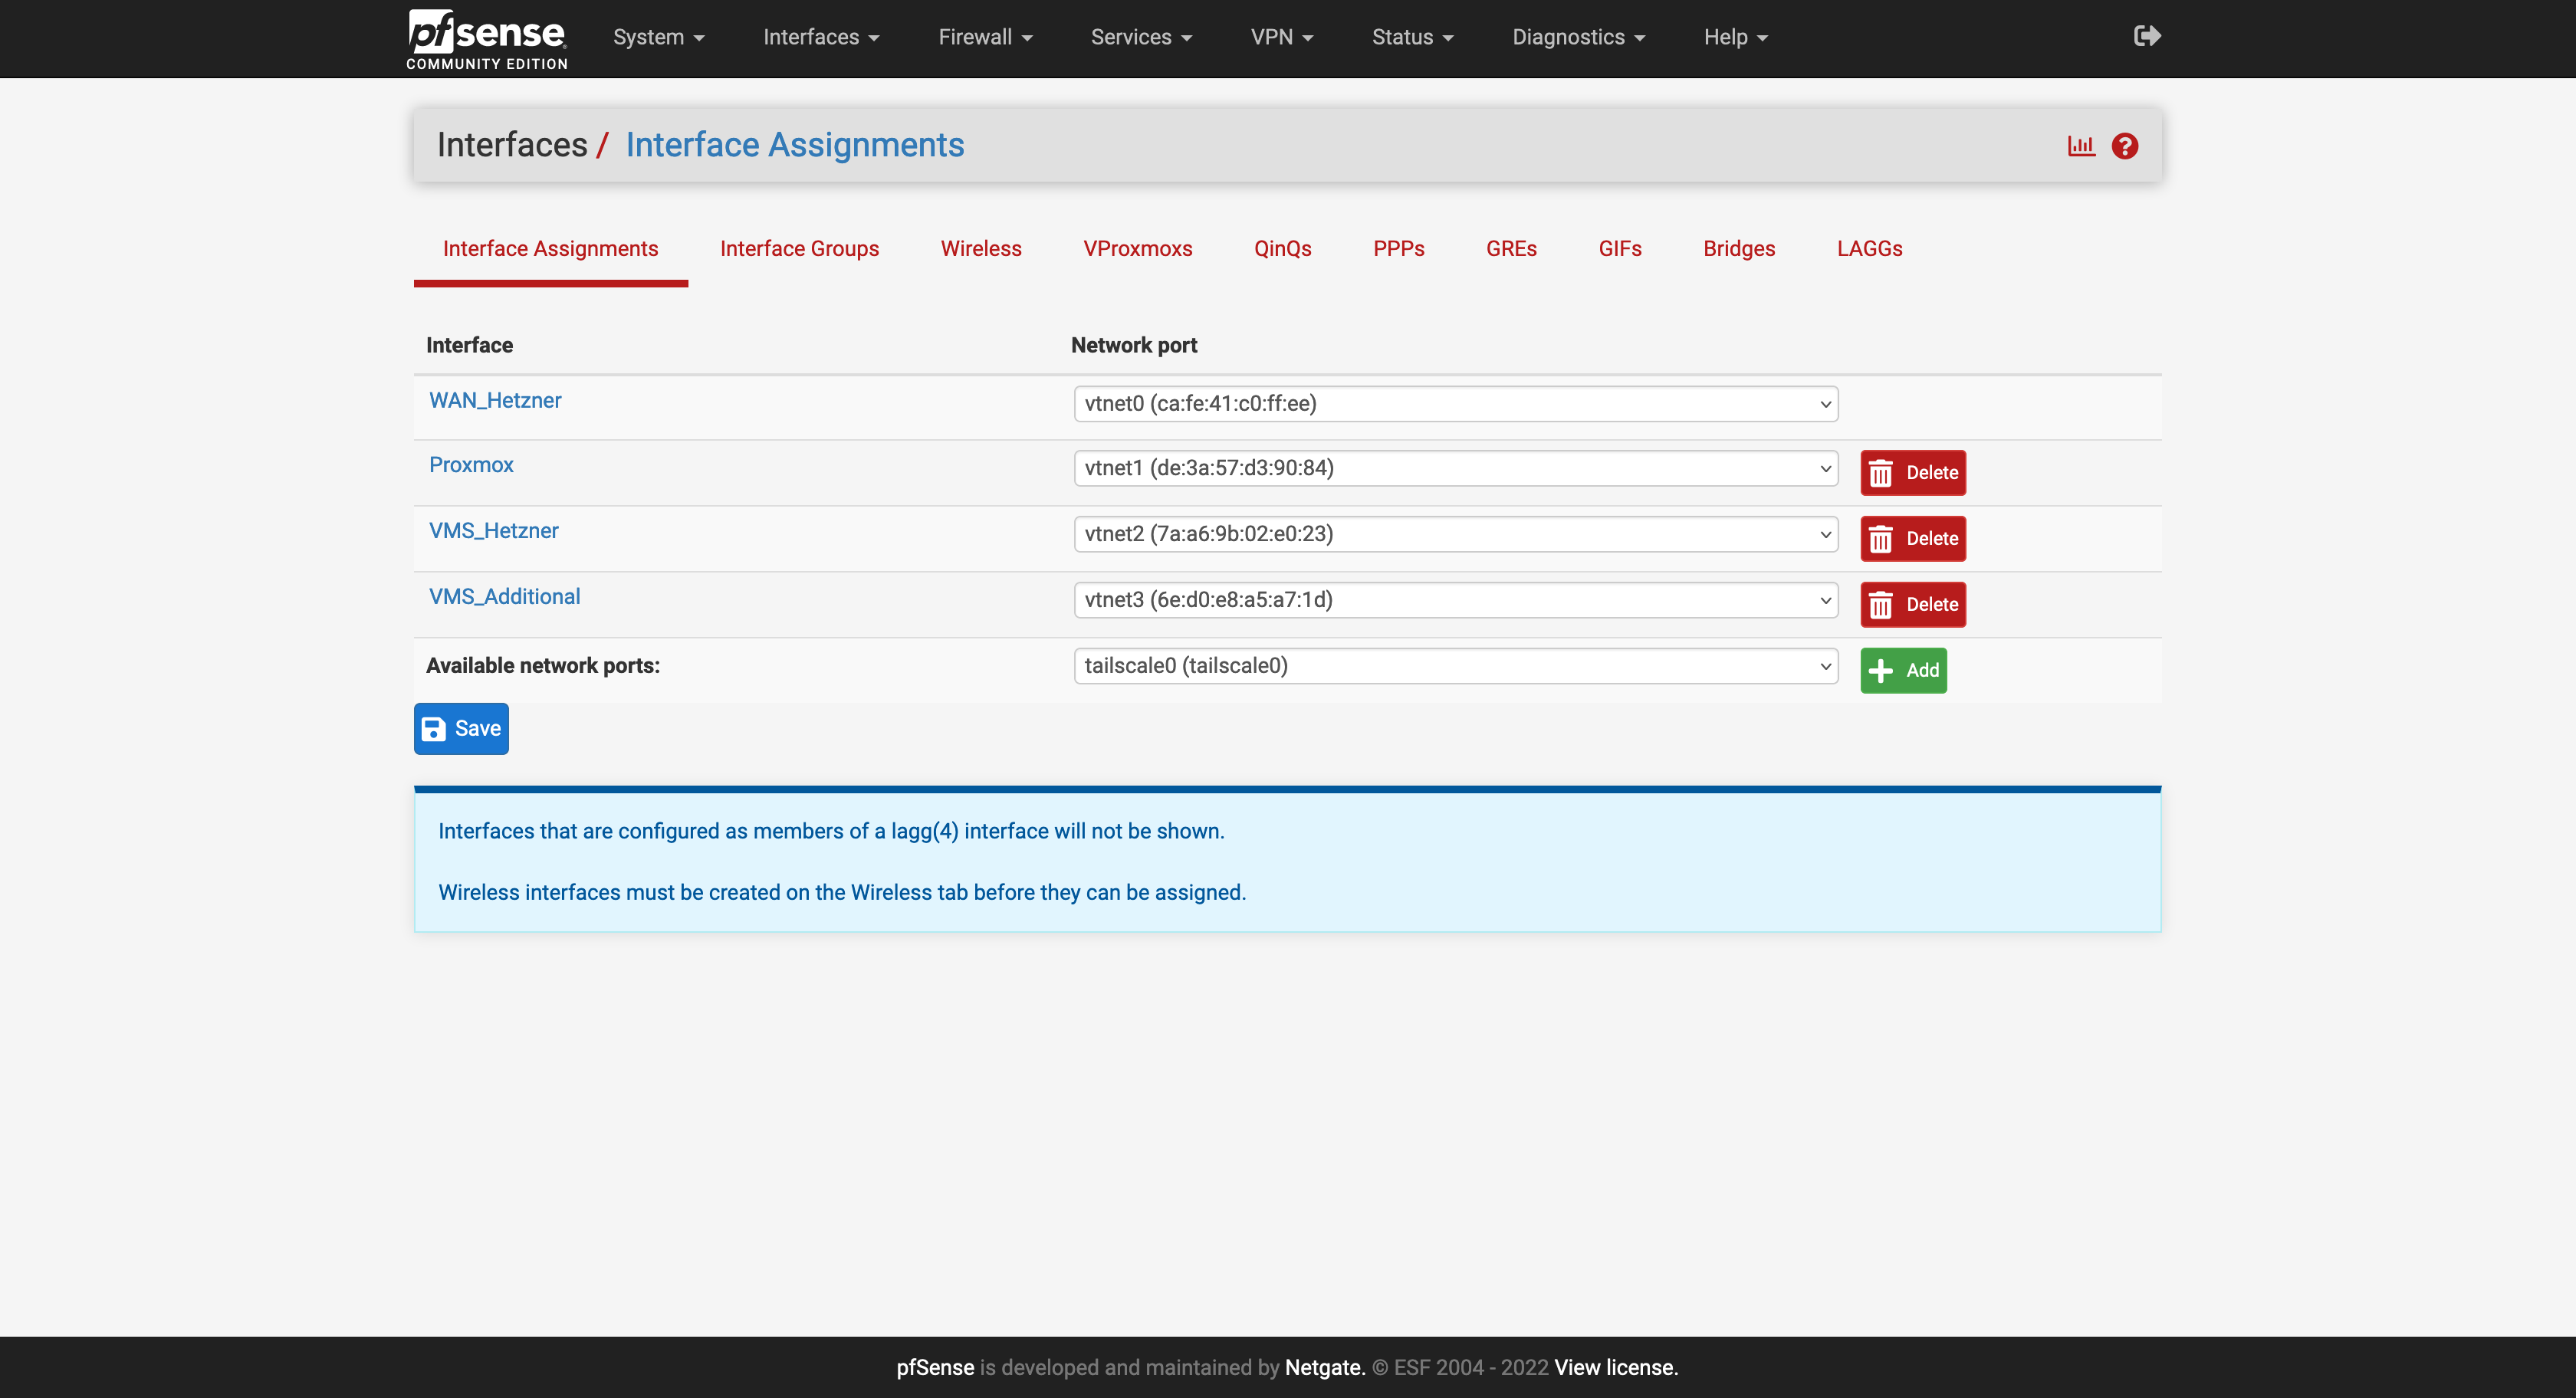
In the Interface Assignments page, you will have the option to assign Tailscale as an interface.
DO NOT ASSIGN IT: it will cause the firewall to fail to boot when it looks for an interface that isn’t there (since Tailscale isn’t online yet), and then Proxmox and all machines will not be accessible until you recover the Proxmox host.
Split DNS

It’s difficult to keep up with which IP address goes to what server, let’s use DNS to fix that.
In the Tailscale dashboard, click on DNS → Add nameserver → Custom…
- Set the Nameserver to the firewall’s LAN IP address.
- Set the Search Domain to what you’d like to use with your hosts.
For example, if you have a web server in a cluster that’s web-1, then it would be accessed with web-1.example
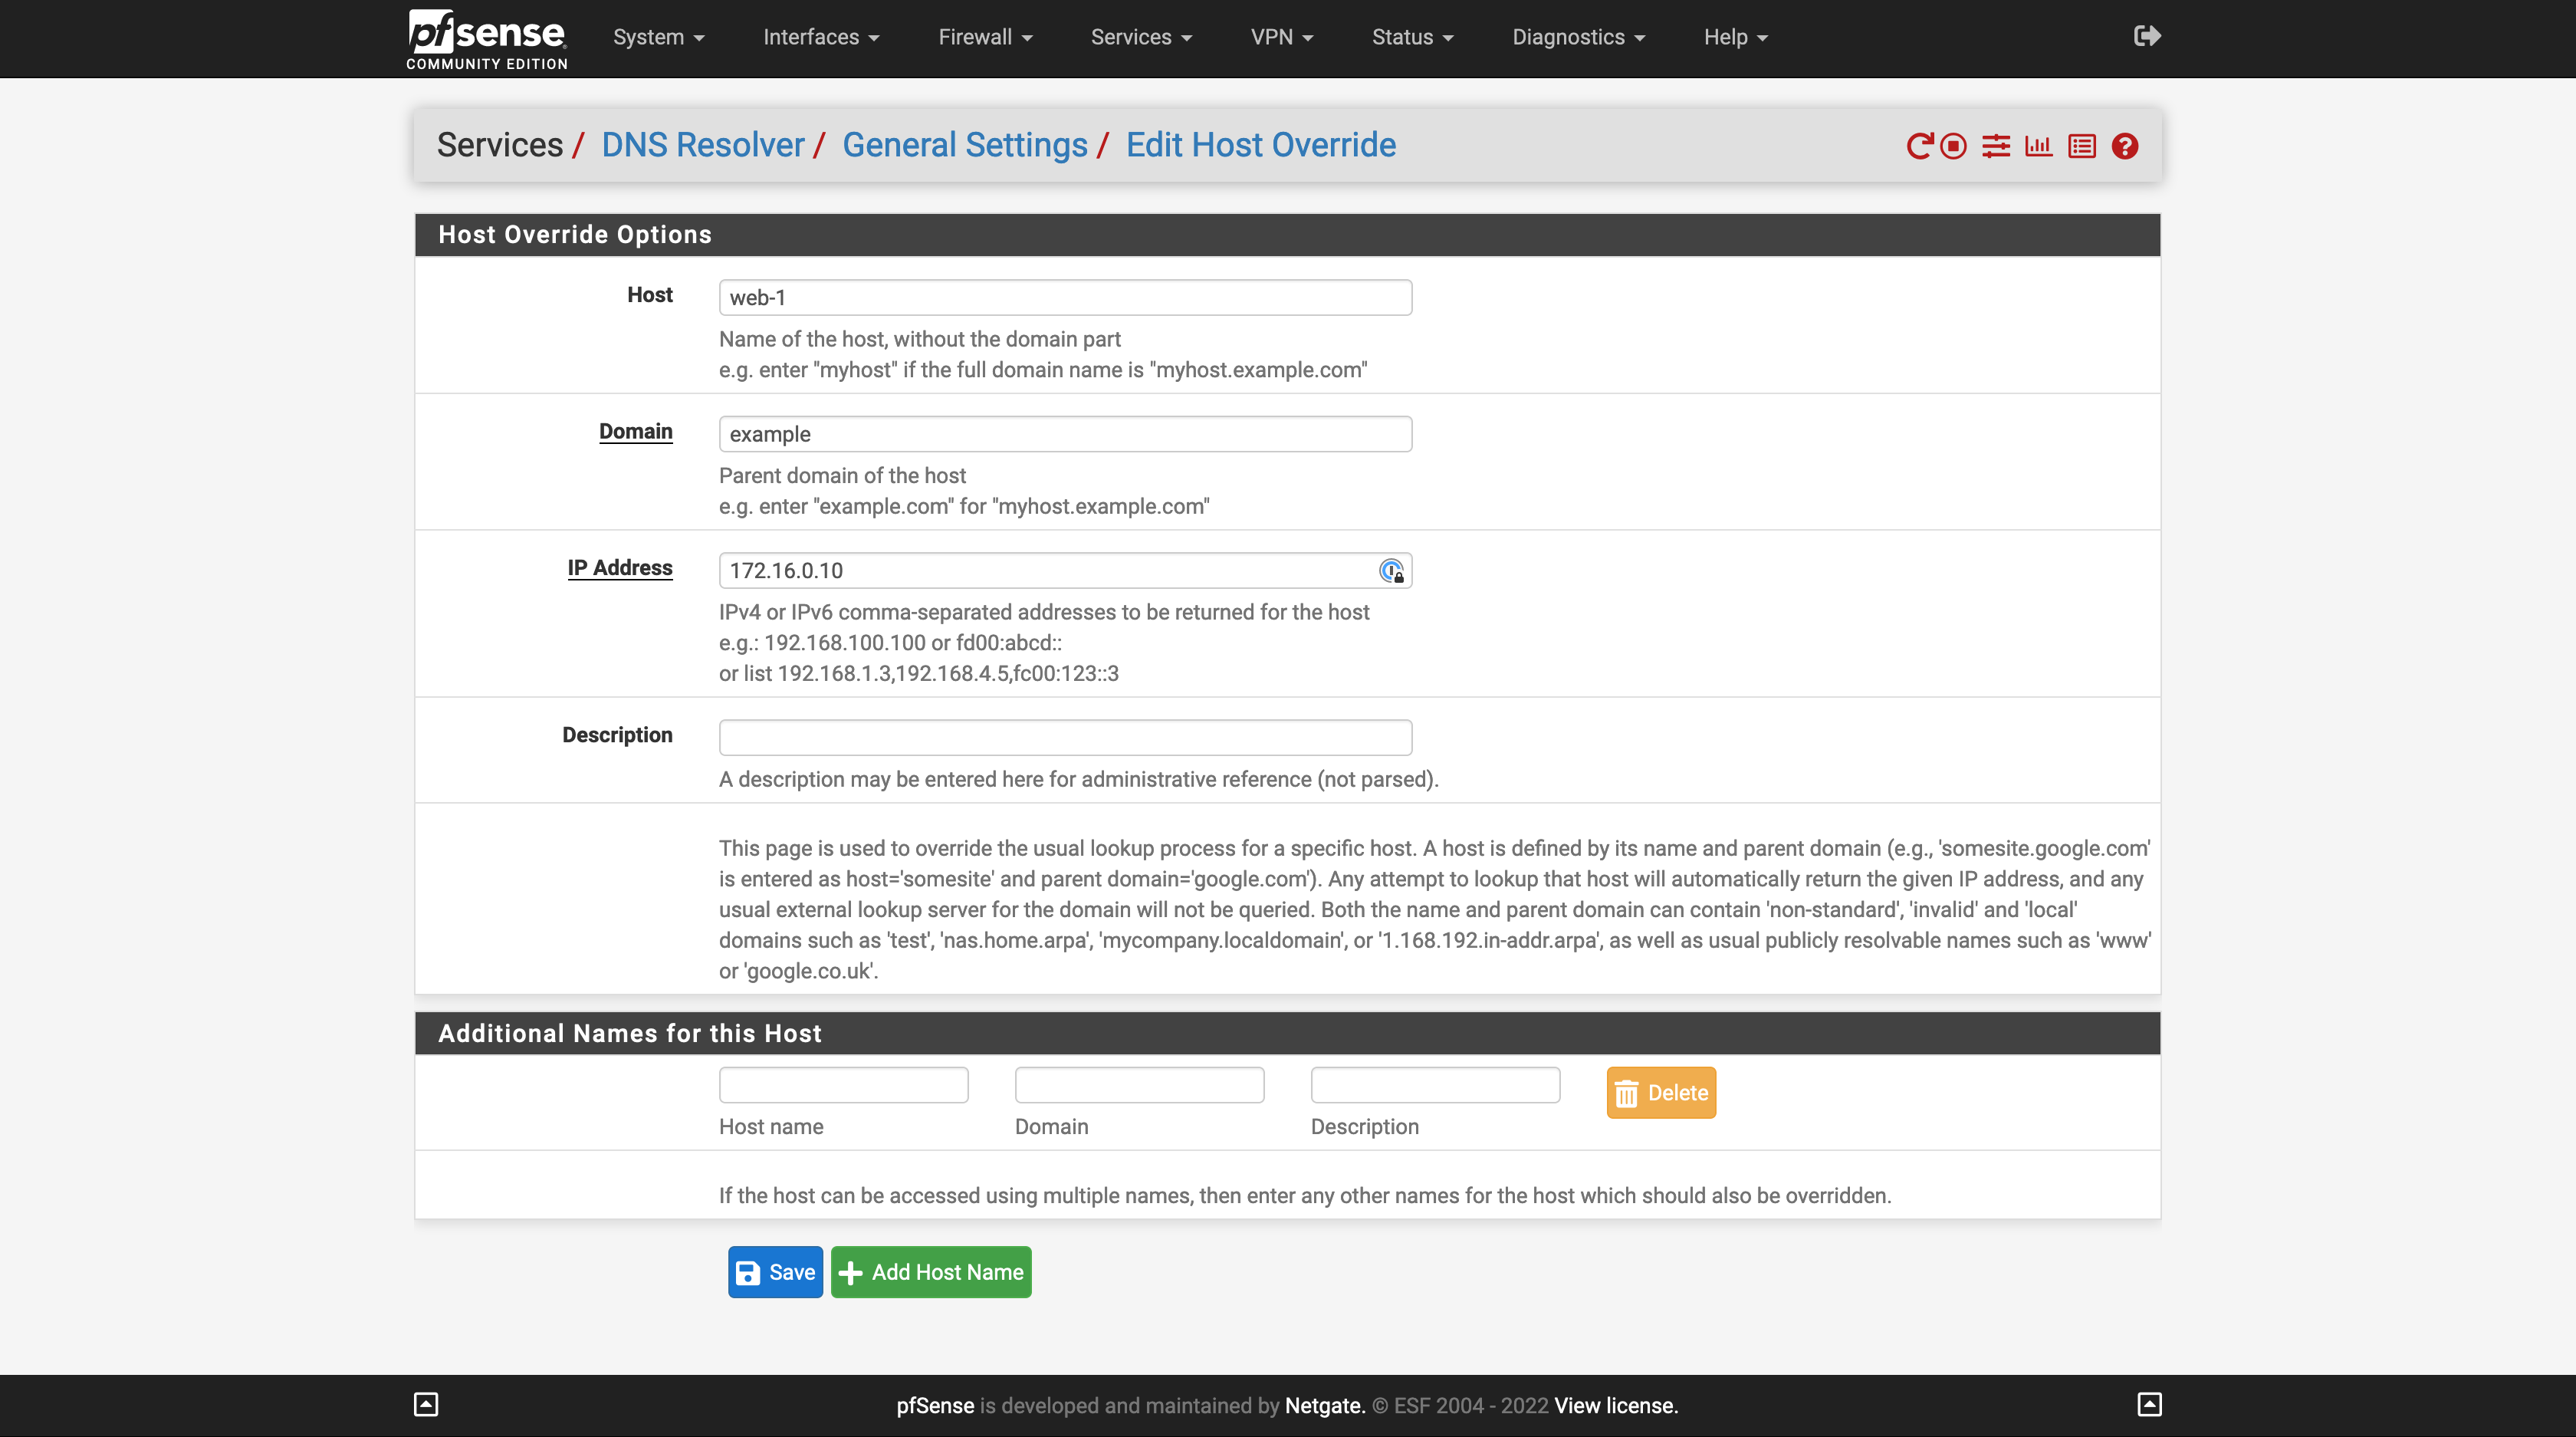
To add entries for each of the hosts, click on Services → DNS Resolver → Host Overrides → Add.
Table of Contents
18 replies on “Deploying Proxmox 7 behind a firewall VM”
Excelente post
Thanks, John!
Great post. Thank you so much – exactly what I was looking for!
But I’m missing a step-by-step guide to include Traefik 2 to your setup.
Or can’t I simply find it?
Hi Fred,
I try to split complex topics into their own articles. You can find my Traefik 2 guide at https://LTG.FYI/Traefik-2. Please let me know if you have further questions, and I’ll try to answer them here or perhaps write additional articles.
Best regards,
Louis
Great post. Thanks!
I’m just in the process to replicate your setup.
Nearly everything is working but I can’t get any DNS servers working on OPT2. The traffic is routed over the WireGuard-VPN, all fine.
But it seems that any UDP traffic is blocked and I can’t figure out where to unblock it. Any hints much appreciated! Thank you.
Hi Andreas,
Off the top of my head, maybe I forgot to document the DNS Resolver section, but will have to go re-read my article and look for anything that I might have missed, but am in the middle of bee season (video of some of it: https://LTG.FYI/YouTube) and helping restore multiple ranches, so it may take me a moment.
I’ll e-mail you and try to figure it out with you. Once you and I figure this out, I’ll make appropriate edits to the article or one of us can write here in the comments about what needed to be changed.
Thanks,
Louis
EDIT: I e-mailed you and the e-mail bounced back as an invalid address. Please feel free to reach out again with a way for me to contact you, so that we can try and figure out what the problem is.
Thank you so much for your tutorial!!!
I can’t access the Ingress server from the VMS_Hetzner network, from external it’s working.
Like in your example: “Now I can access the simple server remotely by visiting http://65.109.71.115:8000”
I can access the website from my browser, but not from a browser running with any VM on the VMS_Hetzner network.
Any idea which Firewall rule is blocking the access from VMS_Hetzner to WAN_Hetzner?
Hi Loomer, you are most welcome! 🙂
I used the interface’s address for the VMs to access the firewall interface. Please see https://thad.getterman.org/articles/proxmox-7-behind-firewall-vm/5/#live_desktop for an example of a Virtual Machine accessing the firewall’s GUI via the VM interface address to configure it instead of the WAN address.
Best regards,
Louis
EDIT: I e-mailed you and the e-mail bounced back as an invalid address. Please feel free to reach out again with a way for me to contact you.
I am new to proxmox and your article just blew me away.
I just got the hetzner with 15hdd (no nvme) and I asked for KVM to install proxmox directly on the baremetal
But you do some sort of magic.
you boot into recovery and install proxmox in qemu?
I cannot say I follow
I am not sure I follow (and obviously I already broke my setup trying to change the network settings)
Hi Marcin,
I’ll e-mail you so that we can schedule a time for me to have office hours with you; you screen share with me in observation mode so that I can tell you what to click on and help you get up and running.
I’ll make a YouTube video out of it and then add one or more relevant videos to this article.
Talk soon,
Louis T. Getterman IV
Hi,
Thank you very much for sharing this tutorial. It was extremely useful.
My home lab server was running for a few weeks without any problems. However, I have decided to upgrade Proxmox from v7 to v8 this week. I temporarily updated the /etc/network/interfaces file with the configuration in the /etc/network/config-recovery file. The upgrading process ran smoothly, and, in the end, I have updated the /etc/network/interfaces to the original configuration. Everything is working except the fact that in the Proxmox instance, I have no access to the internet. After some debugging, I noticed that, with the upgrade, the default gateway of Promox changed to 172.16.0.1. The output of ip route show is:
default via 172.16.0.1 dev vmbr2 proto kernel onlink
172.16.0.0/24 dev vmbr2 proto kernel scope link src 172.16.0.0
192.168.1.0/24 dev vmbr1 proto kernel scope link src 192.168.1.2
If I delete that and manually define the default gateway to 192.168.1.1 everything works normally. Also, if I comment the line with ‘gateway 172.16.0.1’ in the /etc/network/interfaces, the problem is solved after restarting the networking service. I am not sure if I am supposed to do that, as you had that line in the /etc/networks/config-runtime file
Hi Miguel,
I had the exact same problem.
I can resolve it after a reboot by using the command:
ip route replace default via 192.168.1.1 dev vmbr1 proto kernel onlink
But how can you make this change permanently? What needs to be changed in /etc/network/interfaces?
Has anyone else done the upgrade to v8?
Any guide available?
I’m a little bit scared to do it.
Hey Louis,
First, awesome guide.
However, I am running into some issues when trying to do the same on my Hetzner dedicated server. For some reason, even if I follow all steps, the OPNsense/pfSense VM can’t be reached via the public address.
Will we see an update for Proxmox VE 9?
I’d appreciate this and leave a donation. 🙂
I’ve been meaning to get back around to it with a lot of expansions (and finish my DevOps book that this chapter is from), but I’ve been sidetracked with building Live.Farm. The short answer is that yes, I’ll work on firing up bare metal to start kicking the tires when I can.
That sounds great. Where can you preorder the book?
Hetzner users will definitely benefit from a clear, reliable walkthrough—especially with all your nuances. I’m genuinely excited to see your updated guide when it’s ready. It’ll be a huge help for those wanting a smooth, production-ready install.
And yes — if you publish it, I’d happily support it with a donation. Keep up the great work!