Configuration
Proxmox
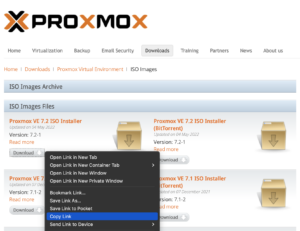
First, download the Proxmox ISO to the server, and take note of the path. For the sake of simplicity, I saved it to /tmp/proxmox.iso using the following command after I right-clicked on the download link and copied the generated URL:
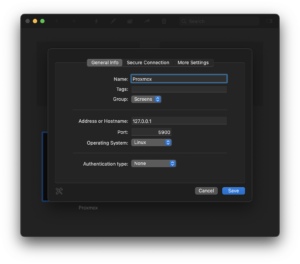
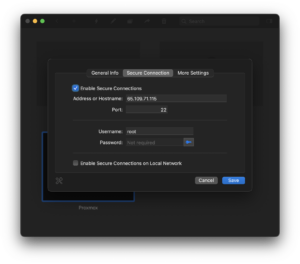
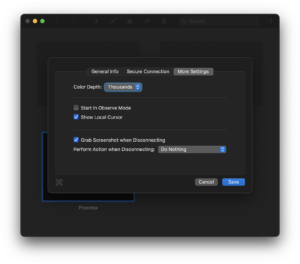
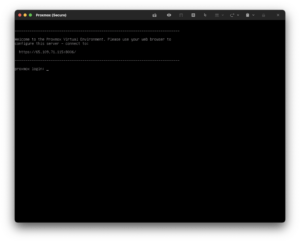
Then, download a VNC client such as Screens and configure it to use an SSH tunnel to your server with VNC running on the local host:
Install
Using information from above, specifically, the ISO path and the NVMe SSD device paths, it’s now time to launch the Proxmox installer via virtualization:
qemu-system-x86_64 \
    -enable-kvm \
    -smp 4 \
    -m 4096 \
    -boot d \
    -cdrom /tmp/proxmox.iso \
    -drive file=/dev/nvme0n1,format=raw,media=disk \
    -drive file=/dev/nvme1n1,format=raw,media=disk \
    -vnc 127.0.0.1:0
You may be wondering why I didn’t use my Shoehorn utility in this article. It’s because I need to work with multiple drives in order to set up ZFS RAID1, and as a result, I need to push an update to my utility to support this.
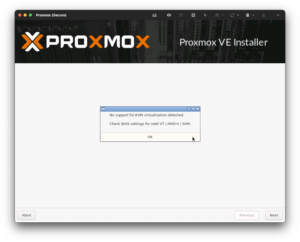
When you proceed, the installer will warn you that it doesn’t support KVM virtualization. Click OK to proceed to the next step.
When you reach the target installation screen, consider employing redundancy with ZFS RAID1 to run your system so that it will continue running even if one of your two hard drives fails:
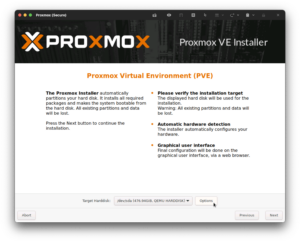
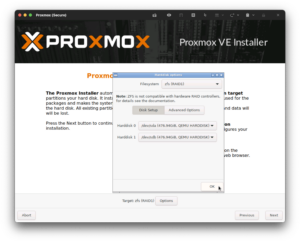
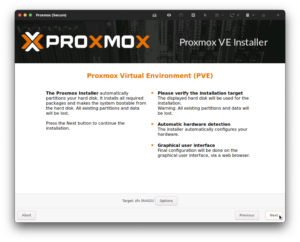
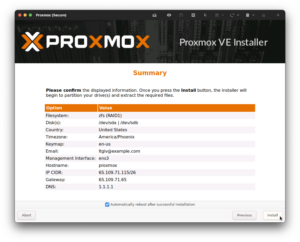
Since Daylight Saving Time is the bane of my existence I disable it in the installer by selecting the timezone of one of the few sensible states out of the entirety of the U.S.A., Arizona (GMT -7). Once I have Proxmox up and running, I proceed to switch the system from Arizona to UTC:
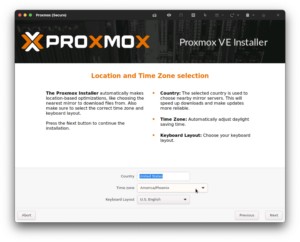
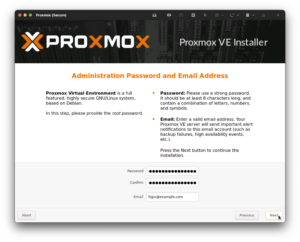
After setting the location and time zone, you will be prompted to create an administrator account. Please ensure that your password is complex, because your management interface will be briefly exposed on the Internet in one of the subsequent steps until we secure it behind the virtualized firewall.
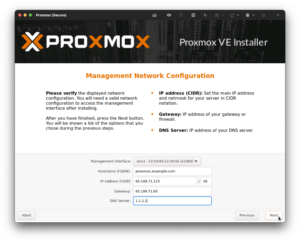
Remember the network information that we gathered in the beginning of this article? This is where it comes into play, which behind the scenes is provisioning /etc/network/interfaces which we will modify in an upcoming step. Please note that the interface is wrong due to emulation, and we will fix that in a subsequent step. For an initial DNS server, I use 1.1.1.1.
On the topic of DNS: once I have Proxmox up and running, I proceed to add additional DNS servers, such as Google’s DNS.
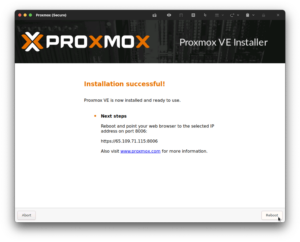
Before proceeding with the installation, please confirm that your settings are correct. Upon completion, the only option will be to reboot the server (whether or not you enable automatic reboot) and the initial installation screen will appear again. When the initial installation screen appears, switch back to your rescue terminal and hit CTRL-C (^C) to stop emulating the Proxmox installer.

Network
Now it’s time to launch our freshly installed Proxmox and work on the network configuration:
qemu-system-x86_64 \
    -enable-kvm \
    -smp 4 \
    -m 4096 \
    -boot c \
    -drive file=/dev/nvme0n1,format=raw,media=disk \
    -drive file=/dev/nvme1n1,format=raw,media=disk \
    -vnc 127.0.0.1:0
After logging in with the user, root, and the password that you set in the installer, you’ll need to create two files in /etc/network/ which will be used to overwrite /etc/network/interfaces based upon your needs:
- Recovery
- Runtime
Recovery
Remember the steps that we used to obtain the NIC Name? That comes into play here. Let’s start by modifying /etc/network/interfaces and subsequently backing it up to /etc/network/config-recovery.
Please remember: your results will be different from mine, and this file is modified using my results.
To replace the NIC Name from ens3 (which was set during the virtualized installation) to my NIC Name, enp41s0:
sed -i 's/ens3/enp41s0/g' /etc/network/interfaces
Now add a second network bridge which will be used in a subsequent step for configuration:
cat << 'EOF' >> /etc/network/interfaces

auto vmbr1
iface vmbr1 inet static
        address 192.168.1.2/29
        gateway 192.168.1.1
        bridge-ports none
        bridge-stp off
        bridge-fd 0
#Firewall LAN: Proxmox — vtnet1

EOF
The final result of /etc/network/interfaces:
source /etc/network/interfaces.d/*

auto lo
iface lo inet loopback

iface enp41s0 inet manual

auto vmbr0
iface vmbr0 inet static
	address 65.109.71.115/26
	gateway 65.109.71.65
	bridge-ports enp41s0
	bridge-stp off
	bridge-fd 0
#Firewall WAN — vtnet0

auto vmbr1
iface vmbr1 inet static
        address 192.168.1.2/29
        gateway 192.168.1.1
        bridge-ports none
        bridge-stp off
        bridge-fd 0
#Firewall LAN: Proxmox — vtnet1
Now that we have a working configuration file, let’s back it up to /etc/network/config-recovery
{

    cp -va \
        /etc/network/interfaces \
        /etc/network/config-recovery \
    ;

    cp -va \
        /etc/network/interfaces \
        /etc/network/config-runtime \
    ;

}
Runtime
This is going to be a bit of an exotic setup that may seem daunting at first. This is based on a Proxmox forum post, [TUTORIAL] Proxmox @ Hetzner, using a single public IPv4 address (+IPv6/64) while all traffic, including host goes through virtualized Firewall (ex. Pfsense), by effgee. The objectives of this configuration are:
- Use a Single IP address.
- Change the server’s physical MAC address to an unused one. Since I keep bees, I opted for “beeeeeeeeees!”:
be:ee:ee:ee:ee:e5— you can set this to whatever you want since it’s not going to be used. - Place a virtualized firewall in front of everything, including the Proxmox host with the server’s physical MAC address:
ca:fe:41:c0:ff:ee - Create four network bridges:
- WAN: Internet ↔︎ Firewall
- LAN: Firewall ↔︎ Proxmox
- LAN: Firewall ↔︎ Virtual Machines on initial IP address
- Optional LAN: Firewall ↔︎ Virtual Machines on additional IP address(es)
Due to the size of this file, it may be easier for you to edit it after booting Proxmox with the instructions below, since we’re still running the network recovery configuration in an emulator and can’t easily copy and paste.
Please remember: your results will be different from mine, and this file is modified using my results.
The two major changes for this file are going to be the NIC name and NIC MAC. Optionally, you can modify the LAN subnets if these don’t suit you.
/etc/network/config-runtime
source /etc/network/interfaces.d/*

auto lo
iface lo inet loopback

auto enp41s0
iface enp41s0 inet manual
	hwaddress ether be:ee:ee:ee:ee:e5
#Physical Card

auto vmbr0
iface vmbr0 inet manual
	bridge-ports enp41s0
	bridge-stp off
	bridge-fd 0
	bridge_maxwait 0
	pre-up ebtables -t nat -A POSTROUTING -j snat --to-src ca:fe:41:c0:ff:ee -o enp41s0
#Firewall WAN — vtnet0

auto vmbr1
iface vmbr1 inet static
	address 192.168.1.2/29
	gateway 192.168.1.1
	bridge-ports none
	bridge-stp off
	bridge-fd 0
#Firewall LAN: Proxmox — vtnet1

auto vmbr2
iface vmbr2 inet static
	address 172.16.0.0/24
	gateway 172.16.0.1
	bridge-ports none
	bridge-stp off
	bridge-fd 0
#Firewall LAN: VMs (Single IP) — vtnet2

auto vmbr3
iface vmbr3 inet static
	address 172.16.1.0/24
	gateway 172.16.1.1
	bridge-ports none
	bridge-stp off
	bridge-fd 0
#Firewall LAN: VMs (Optional: Additional IP) — vtnet3
This concludes our network configurations. Inside of the emulated Proxmox instance, shut it down:
shutdown -h now
Now in the rescue shell, reboot the physical server, which should load into Proxmox:
reboot
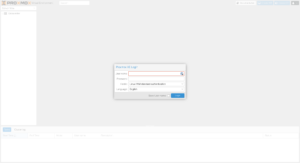
After a moment, you should be able to access your Proxmox instance by going to https://YOUR-SERVER-IP:8006/ and logging in with the root account and the password that you set during installation.
Assuming that you’re using Proxmox for personal or evaluation use, you’ll need to switch from the enterprise to community Proxmox repository:
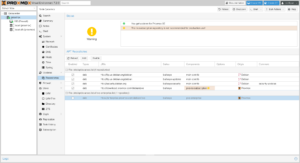
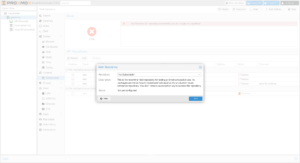
Now that the repositories are configured, refresh and upgrade the packages. A window will open with a terminal, and after upgrading, you can install Mosh if you’re like me, and need to maintain connections when roaming or across cellular and satellite connections. Depending on what was upgraded, you may need to reboot the node after you finish:
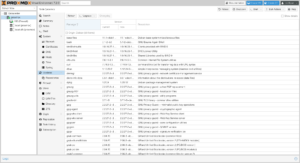
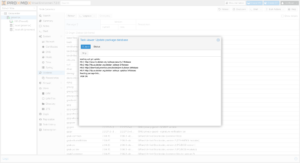
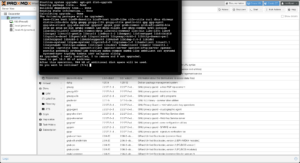
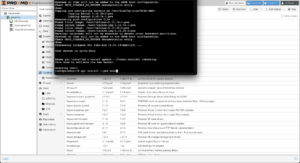
Table of Contents
18 replies on “Deploying Proxmox 7 behind a firewall VM”
Excelente post
Thanks, John!
Great post. Thank you so much – exactly what I was looking for!
But I’m missing a step-by-step guide to include Traefik 2 to your setup.
Or can’t I simply find it?
Hi Fred,
I try to split complex topics into their own articles. You can find my Traefik 2 guide at https://LTG.FYI/Traefik-2. Please let me know if you have further questions, and I’ll try to answer them here or perhaps write additional articles.
Best regards,
Louis
Great post. Thanks!
I’m just in the process to replicate your setup.
Nearly everything is working but I can’t get any DNS servers working on OPT2. The traffic is routed over the WireGuard-VPN, all fine.
But it seems that any UDP traffic is blocked and I can’t figure out where to unblock it. Any hints much appreciated! Thank you.
Hi Andreas,
Off the top of my head, maybe I forgot to document the DNS Resolver section, but will have to go re-read my article and look for anything that I might have missed, but am in the middle of bee season (video of some of it: https://LTG.FYI/YouTube) and helping restore multiple ranches, so it may take me a moment.
I’ll e-mail you and try to figure it out with you. Once you and I figure this out, I’ll make appropriate edits to the article or one of us can write here in the comments about what needed to be changed.
Thanks,
Louis
EDIT: I e-mailed you and the e-mail bounced back as an invalid address. Please feel free to reach out again with a way for me to contact you, so that we can try and figure out what the problem is.
Thank you so much for your tutorial!!!
I can’t access the Ingress server from the VMS_Hetzner network, from external it’s working.
Like in your example: “Now I can access the simple server remotely by visiting http://65.109.71.115:8000”
I can access the website from my browser, but not from a browser running with any VM on the VMS_Hetzner network.
Any idea which Firewall rule is blocking the access from VMS_Hetzner to WAN_Hetzner?
Hi Loomer, you are most welcome! 🙂
I used the interface’s address for the VMs to access the firewall interface. Please see https://thad.getterman.org/articles/proxmox-7-behind-firewall-vm/5/#live_desktop for an example of a Virtual Machine accessing the firewall’s GUI via the VM interface address to configure it instead of the WAN address.
Best regards,
Louis
EDIT: I e-mailed you and the e-mail bounced back as an invalid address. Please feel free to reach out again with a way for me to contact you.
I am new to proxmox and your article just blew me away.
I just got the hetzner with 15hdd (no nvme) and I asked for KVM to install proxmox directly on the baremetal
But you do some sort of magic.
you boot into recovery and install proxmox in qemu?
I cannot say I follow
I am not sure I follow (and obviously I already broke my setup trying to change the network settings)
Hi Marcin,
I’ll e-mail you so that we can schedule a time for me to have office hours with you; you screen share with me in observation mode so that I can tell you what to click on and help you get up and running.
I’ll make a YouTube video out of it and then add one or more relevant videos to this article.
Talk soon,
Louis T. Getterman IV
Hi,
Thank you very much for sharing this tutorial. It was extremely useful.
My home lab server was running for a few weeks without any problems. However, I have decided to upgrade Proxmox from v7 to v8 this week. I temporarily updated the /etc/network/interfaces file with the configuration in the /etc/network/config-recovery file. The upgrading process ran smoothly, and, in the end, I have updated the /etc/network/interfaces to the original configuration. Everything is working except the fact that in the Proxmox instance, I have no access to the internet. After some debugging, I noticed that, with the upgrade, the default gateway of Promox changed to 172.16.0.1. The output of ip route show is:
default via 172.16.0.1 dev vmbr2 proto kernel onlink
172.16.0.0/24 dev vmbr2 proto kernel scope link src 172.16.0.0
192.168.1.0/24 dev vmbr1 proto kernel scope link src 192.168.1.2
If I delete that and manually define the default gateway to 192.168.1.1 everything works normally. Also, if I comment the line with ‘gateway 172.16.0.1’ in the /etc/network/interfaces, the problem is solved after restarting the networking service. I am not sure if I am supposed to do that, as you had that line in the /etc/networks/config-runtime file
Hi Miguel,
I had the exact same problem.
I can resolve it after a reboot by using the command:
ip route replace default via 192.168.1.1 dev vmbr1 proto kernel onlink
But how can you make this change permanently? What needs to be changed in /etc/network/interfaces?
Has anyone else done the upgrade to v8?
Any guide available?
I’m a little bit scared to do it.
Hey Louis,
First, awesome guide.
However, I am running into some issues when trying to do the same on my Hetzner dedicated server. For some reason, even if I follow all steps, the OPNsense/pfSense VM can’t be reached via the public address.
Will we see an update for Proxmox VE 9?
I’d appreciate this and leave a donation. 🙂
I’ve been meaning to get back around to it with a lot of expansions (and finish my DevOps book that this chapter is from), but I’ve been sidetracked with building Live.Farm. The short answer is that yes, I’ll work on firing up bare metal to start kicking the tires when I can.
That sounds great. Where can you preorder the book?
Hetzner users will definitely benefit from a clear, reliable walkthrough—especially with all your nuances. I’m genuinely excited to see your updated guide when it’s ready. It’ll be a huge help for those wanting a smooth, production-ready install.
And yes — if you publish it, I’d happily support it with a donation. Keep up the great work!